,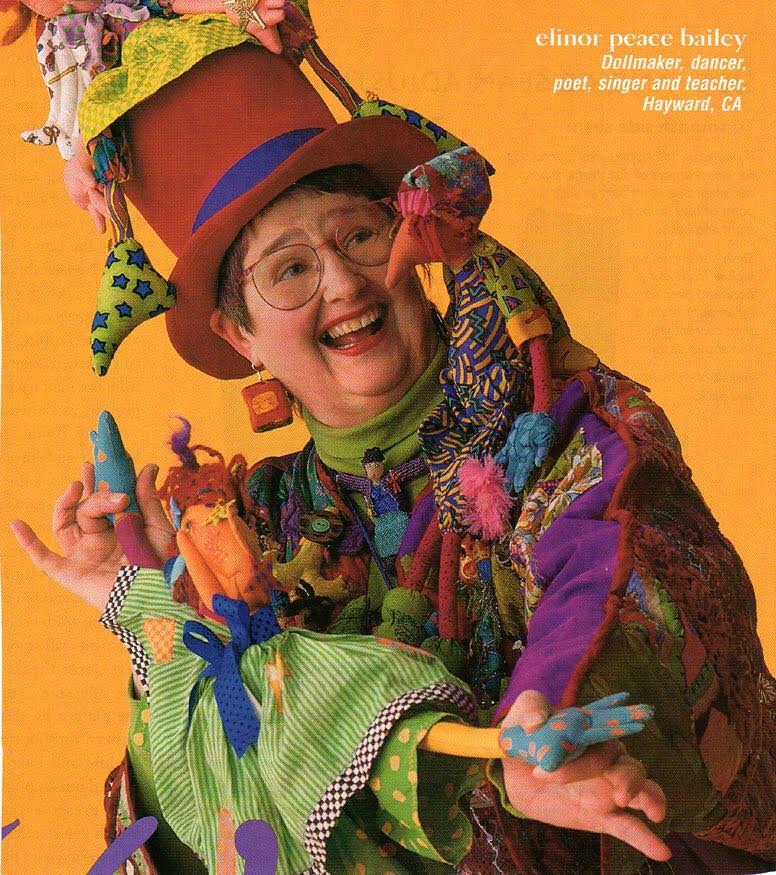
About 30 years ago, I was graced with an opportunity to study cloth doll making with the unforgettable elinor peace bailey. She spelled her name with lower case letters. Everything else about elinor peace bailey was larger than life. Today, I am remembering some of what I appreciate about this masterful creator:
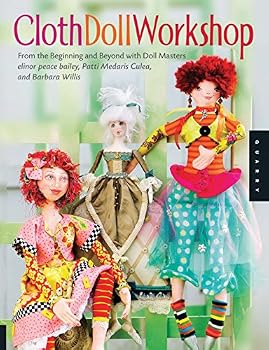
I recently purchased a book collaboration of 3 of the cloth doll artists who have molded my life. Other doll makers featured in the book:
Barbara Willis – Cloth Doll Maker – A Tribute to Doll Makers Who Have Fostered My Creativity
Of the 3, elinor peace bailey is the true artist. I consider it a blessing that I was able to study personally with her. Even her patterns are works of art–suitable for framing. elinor peace bailey studied art at Parsons.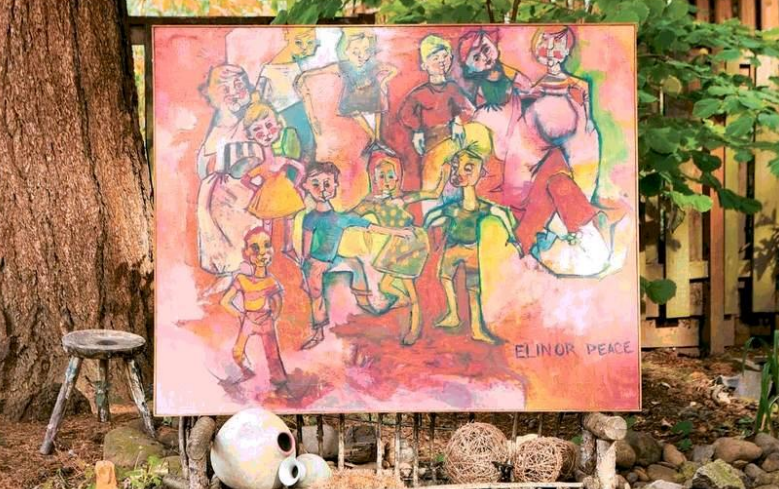
ALL OF ME
(above)”This is a painting I did when I was a student. My mother had
claimed it, but when my sister, Marie Fay, moved in with me, she brought it
with her. The painting reminds me of how little I have really changed. I still
love the variety of children that play upon its surface; I am still there.” elinor peace bailey
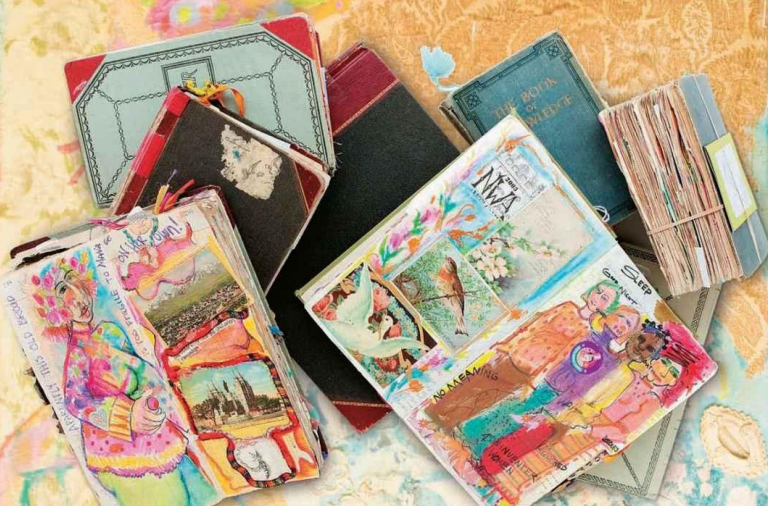
JOURNALS
(above)For about ten years, I have kept art journals. As I tell my students, “I
lead a personal, but not a private life.” My focus point is the figure, old
postcards, and other paper treasures. I alter an old book with gesso painted
onto the pages. I add various items from my paper collection and then enter
words and embellish with figures. I use a variety of graphic supplies, which I
collect. These books are filled with the ideas that I am developing.
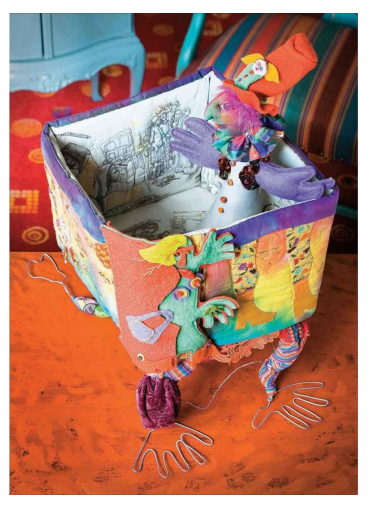
Drawing Out of the Box
“This complex piece is a treasure trove of my thoughts and
aspirations. My personal myth is written on the inside, and my journey to
doll making is stitched on the outside. The bottom features a giant stamped
message that reads, “I am me for that I came.” All of these words and fabric art ride on the back of a crawling figure, symbolic of the tortoise on whose
back sits the world. It must be apparent by now that I am a self-proclaimed
navel gazer and consider my art very self-centered.” elinor peace bailey
I own the following of elinor peace bailey’s doll patterns and books:

Let’s Face It
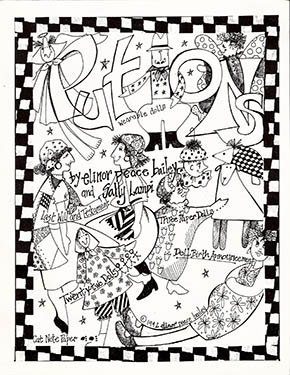
Put Ons: Wearables
This hilarious book is a tribute to elinor’s brilliantly creative mind and to her skill as an artist who draws and paints–as well as one who sews.
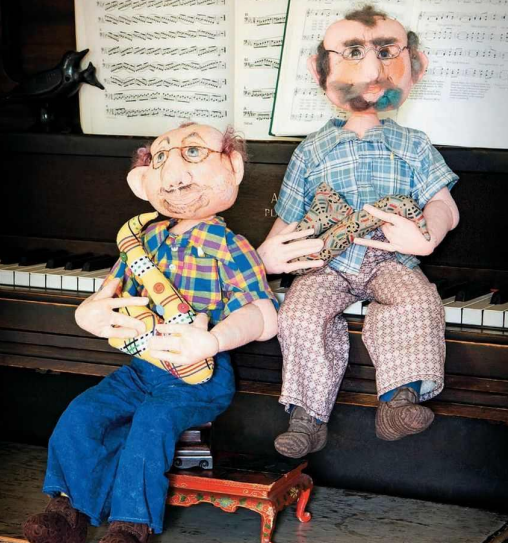
GOOD OLD BOY—TIMES TWO
(above)”This doll is a tribute to Gary, the man who shaped so much of my
life by providing me the freedom to find my own way. The Good Old Boy
not only has a western reference, but is also a treasured family name. And
because Gary played the saxophone, the Good Old Boy does, too. Today, the
Good Old Boy doll is available as a pattern, which can be translated into
many different characters. To me, the Good Old Boy is just Gary being himself.”
[Note: This says something about both elinor and Gary. At the time that I worked with elinor, she was a cloth doll super star. She spent at least half her year on the road, teaching and presenting. During one of her absences, I called elinor’s home — her home number was the same as her business. Gary answered the phone. Ina matter of seconds, I could attest to the fact that Gary indeed was a Good Ole Boy.]

Isaac Elf and Lily Lou
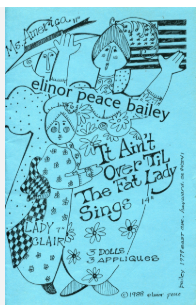

It Ain’t Over Til

Mad Maddie
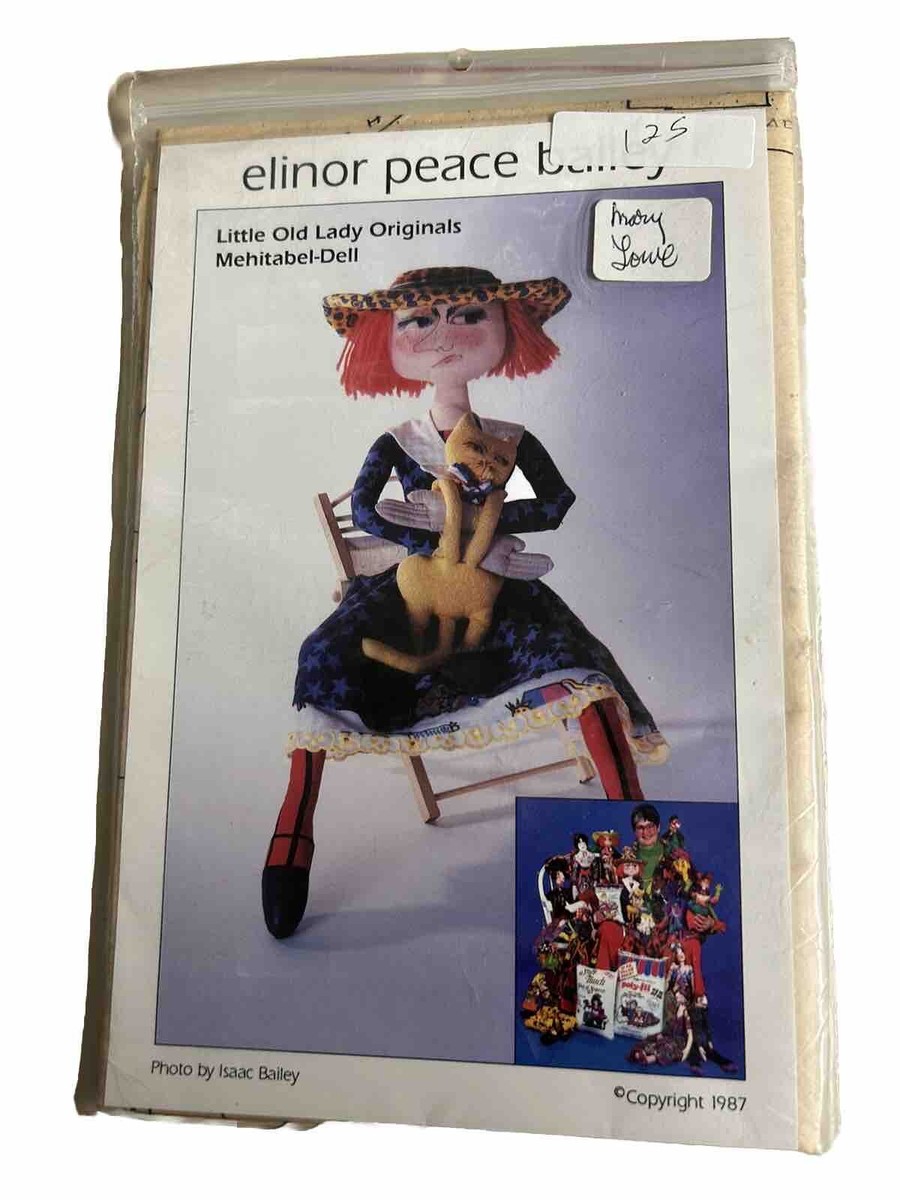
Mehitabel Del
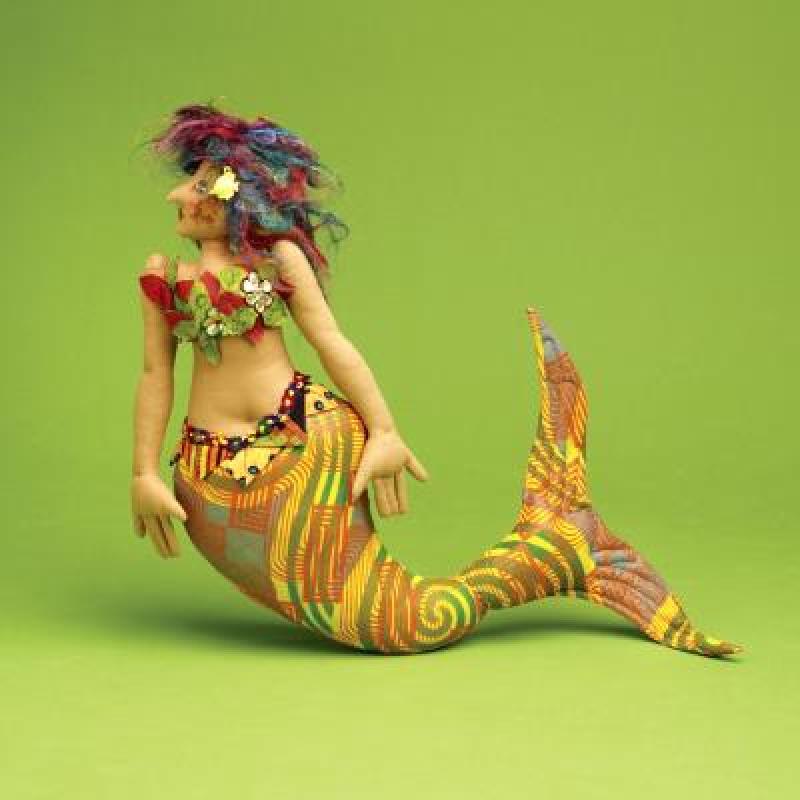
Mermaid
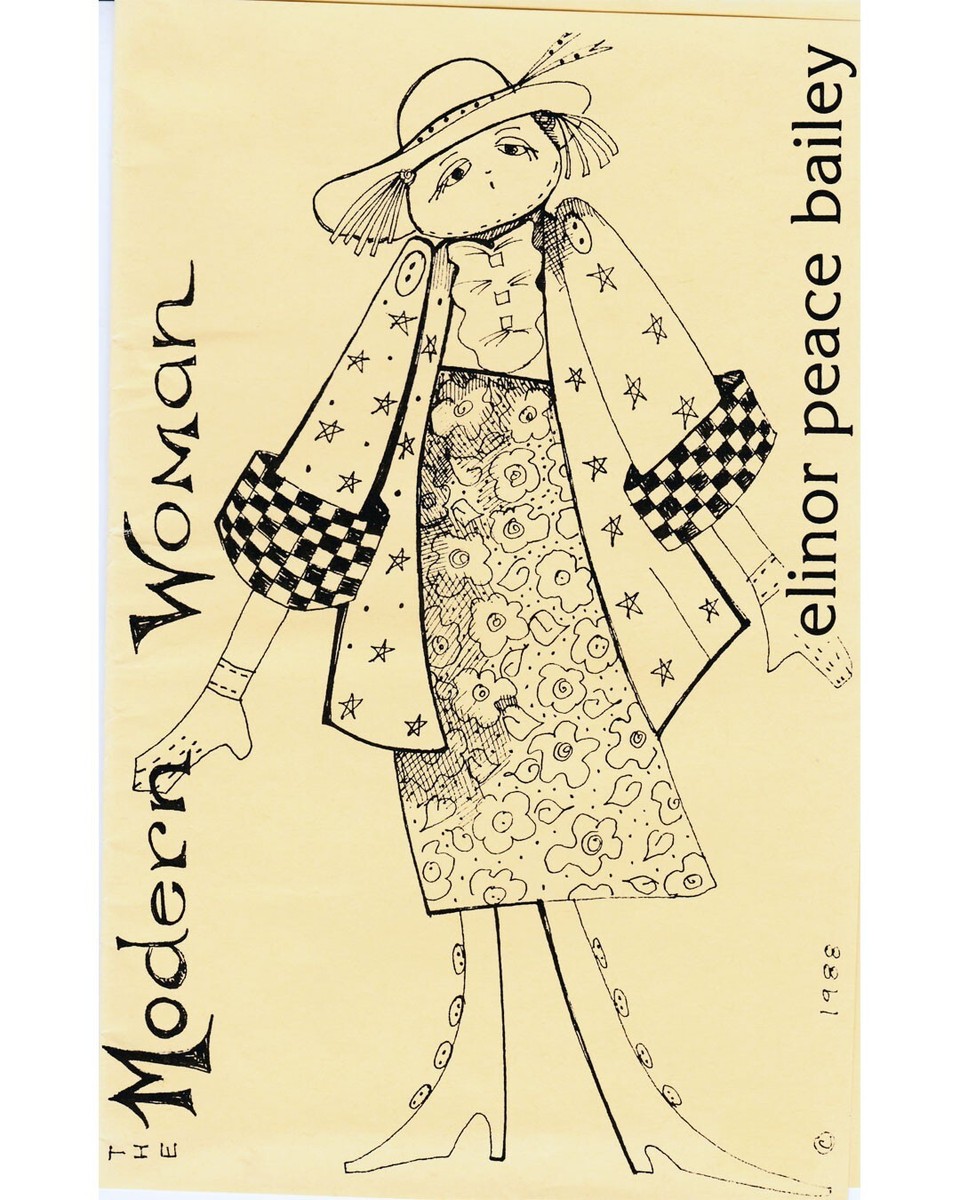

Modern Woman

Monique

Percy Goodfellow
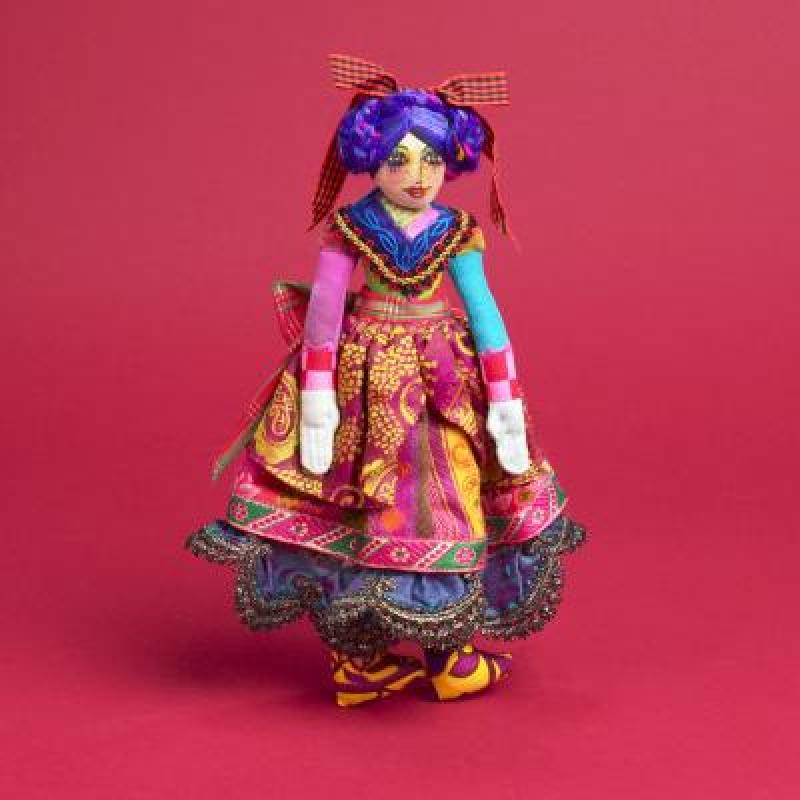
Pierot and Pierette
Elinor Peace Bailey’s Pierrot and Pierrette (often featured together in her vintage, soft-sculpture sewing patterns from the 1980s) typically make dolls that stand abou(2t \.5^{0\prime \prime }\) to \(22^{\prime \prime }\) tall, depending on how they are stuffed. Her similar Mini Pierrot & Victorian Doll pattern yields much smaller \(10.5^{\prime \prime }\) dolls.

Victorian Doll
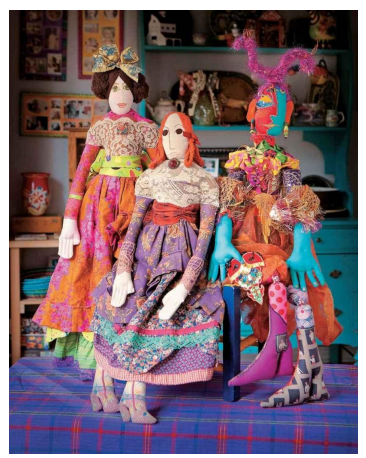
“The very first doll that I created a pattern for was The Victorian
Doll, shown here in three of countless variations. I have sold nearly 20,000
copies of this pattern through the years and many of my students still show
up to class prepared to make their first doll in Victorian style. This doll is not
complicated and is primitive in style, but I could not design her today, as I
know too much to be satisfied with the simple techniques she was born from.
In the three hundred, or so, times that I have reproduced her, she still
continues to give me pleasure.” elinor peace bailey
[Note: I bought several of these patterns that came in group lots. I do not like anything about this doll. She IS NOT an elinor type of doll. But I admire that epb is not ashamed to look back at her less glorious creations as part of her journey to success. Also, note that any pattern can become numerous versions of herself–See the red monster version below]
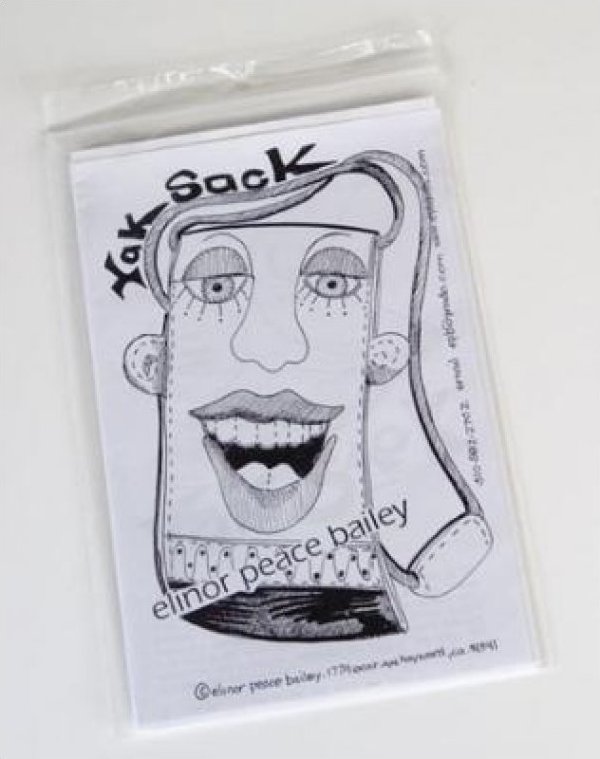
Yak Sack

Yobo
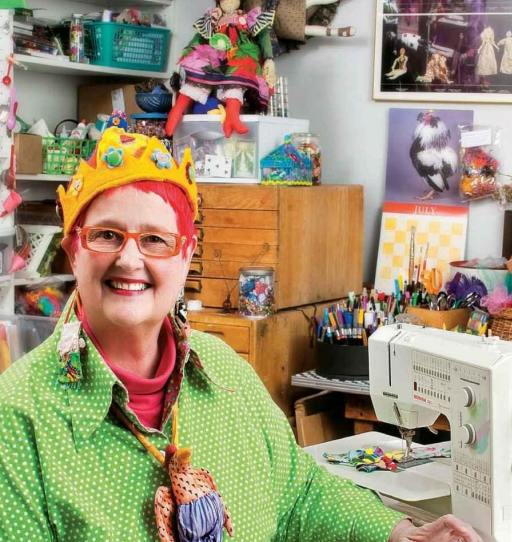
elinor peace bailey in her home studio
ELINOR’S STUDIO
“A visit to elinor’s studio reveals an exercise in quiet encroachment. She has
pretty much taken over the family area and grudgingly shares the couch and
a bit of a table with her long-suffering sister Marie Fay. ‘If you can’t see it,what’s the use of having it?’ elinor asks. She insists on seeing her full palette of trims, fabric, buttons and beads. Chaos reigns during the creative process; however, restoring order helps elinor refocus. She also loves containers and
drawers, which seem like small revelations.” Cloth Doll Workshop, pg. 59.
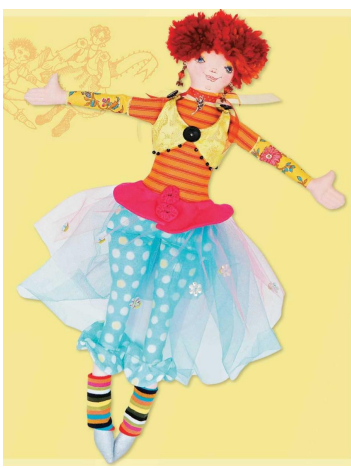
Ginger Doll – elinor peace bailey calls this a pancake doll
Materials List to Make Ginger
• ⅜ yard (34.3 cm) flesh-colored body fabric
• ¼ yard (22.9 cm) shirt fabric
• ¼ yard (22.9 cm) tights and cuff fabric
• cotton scraps for under sleeves, peplum, yoyos
• ¼ yard (22.9 cm) each of two colors of tulle for skirting
• scrap of T-shirt knit—cut into two 3″ (7.6 cm) squares for the socks
• silk scraps for the vest
• three 10″ (25.4 cm) lengths of ribbon
• one charm for the neck ribbon
• three black buttons for vest
• black beads to trim the vest
• beads for earrings
• sequins and beads for top tulle skirting
• wool yarn for hair
• matching threads, sewing, button, and craft threads
• #7 long darners
• beading needle
• Fairfield Poly-fil
• silver or gold Lumiere paint and glitter for shoes
• gesso (a primer for the paint on the shoes)
• Crayola crayons
CUTTING LIST
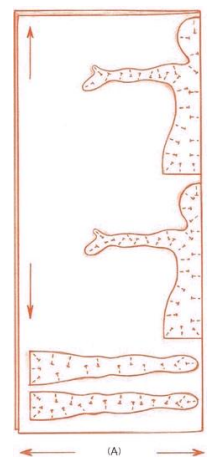
• Body, Blouse appliqué, and Upper tights appliqué: Cut 2 each
with the solid line positioned on the straight-grain fabric fold.
• Legs: Cut 4 times on cross-grain of the fabric.
• Lower tights and Undershirt sleeve appliqués: Cut 4 times.
• Vest (Use pattern included with Gypsy.): Cut 1 from fabric and 1
from lining with solid line positioned on the straight-grain fabric
fold.
• Peplum: Cut 1 from fabric and 1 from lining.
• Yoyos: Cut 2 from same fabric as peplum.
• Pant cuffs: Cut 4 from same fabric as lower leg appliqués.
• Leg warmers: Cut 2 squares 3″ (7.6 cm) each.
• Tulle overskirts: Cut a 45″ × 9″ (114.3 × 22.9 cm) underskirt and
a 45″ × 7″ (114.3 × 17.8 cm) overskirt.
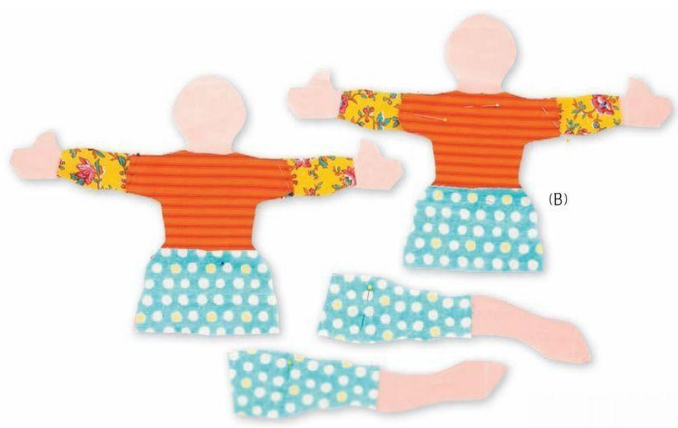
3. Pin the traced appliqué pattern pieces to their selected fabrics. Lay out the
cut appliqué fabrics on the doll body to make sure they fit and look right.
Allow about ¼″ (6 mm) of extra fabric to underlap the edges of the
undershirt sleeves and the upper edge of the upper tights. Cut out the
appliqués; they provide a way of dressing the doll before it is made, so you
don’t have to make itsy-bitsy doll clothes. (B)
4. Cut the clothing fabrics as indicated in the cutting list (opposite) for the
vest, peplum, yoyos, pants cuff, leg warmers, and overskirt.
With the right sides facing, pin and stitch the two body pieces together,
leaving an opening at the lower edge. Repeat for the leg pieces, leaving the
top edges open. Clip the seam allowances as needed for smooth, even
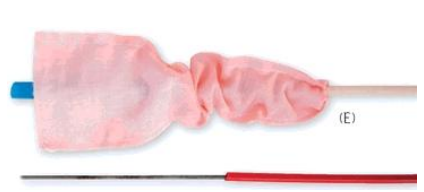
seams. Turn the body and legs right-side out. Turning tubes [Turn-it-all]
turning small body parts easier. (E)
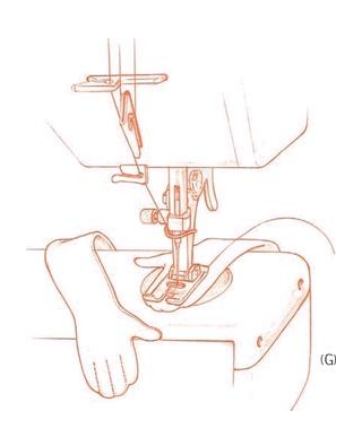
5. Stuff the upper body beginning with the hands. Stuff the hands lightly,
and before stuffing the arms, topstitch the hands to create the fingers. Stitch
the centerline first and then the lines on either side. (G)
 TURNING
Some of the body parts, particularly the hands and fingers, are very small
and can be difficult to turn right side out smoothly and without bursting the
seams open. Turning tubes (see “Resources”, page 123) make turning a
little easier.
To use the tubes, insert the larger tube inside a finger (or thumb). Then
using the smaller tube, turn over the seam allowance, and press against the
finger. The pressure against the seam allowance will help push the finger
inside the hand. Then with the thumb and index finger, pull the fabric onto
the smaller tube.
You’ll need two hands, so hold the larger tube against your stomach.
After you turn each finger, reach in with your hemostats and turn the hand
and then the arm right-side out.
6. Add stuffing up to the elbows, and then topstitch across each arm at the
wrist to form a joint; refer to the pattern for the topstitching location. Stuff
the upper arm, and then stitch across the arm at the shoulder. Stuff the
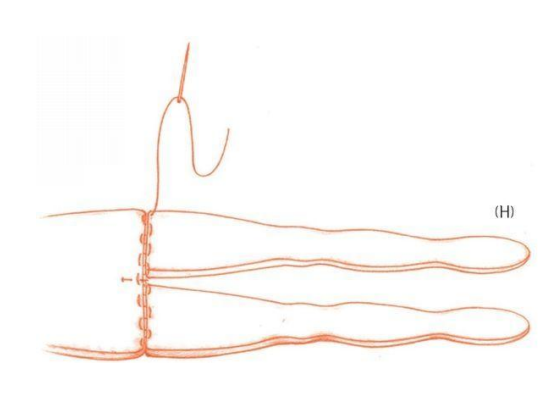
remainder of the body firmly. Pin the crotch opening closed and hand work
a ladder stitch (page 18) to close the opening. Knot and then bury the
threads (page 18). (H)
3. Paint the feet with gesso, and let it dry. Then paint a layer of Lumiere
paint over the gesso, sprinkle the wet paint with glitter, and let the feet dry.
4. With the right sidesof two cuff pieces together, stitch around the outside of
the circle; repeat with remaining two pieces. Turn the cuffs right-side out
and press. Press under the raw edges of the inside circle, and then slide the
cuffs over the shoes to the bottom of the tights; slipstitch or ladder stitch
(page 18) them in place.
5. To make the leg warmers, fold each 3″ (7.6 cm) square of knit with the
right sides together, and stitch the edges opposite the fold to make two tubes.
Turn the tubes right-side out and slide them over the ankles just over the
shoes.
6. Sew the shorter sides of each piece of tulle together with a hand needle
and the blanket stitch to make two tubes. Layer the two pieces of tulle with
the smaller piece on top. Using the heavy button thread, hand sew gathering
stitches at the waist. Slide the tulle skirt onto the doll. Pull the gathers tight,
tie the threads in a knot, and tack it at the waist with the seams at the center
back. The peplum will cover the gathers. Sew an assortment of sequins and
beads randomly over the tulle skirt.
7. A peplum is a bit of skirting that is usually attached to the waist of a
jacket. You created a faux jacket with the appliqué on the doll’s body. The
peplum will be three-dimensional. With the right sides together, stitch the
lining to the peplum fabric, leaving it open as indicated. Clip the seam
allowance and turn the peplum right-side out. Press and stitch the peplum
closed by hand. Tack the peplum in place at the doll’s waist.
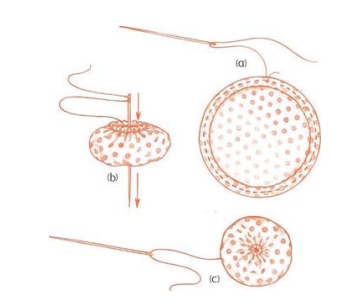
8. With the right side of the yoyo fabric facing up, fold over a tiny hem and
stitch around that hem with a knotted button thread and #7 long darner. (a)
Draw the stitches together to gather up the yoyo and bring the needle to the
back of the yoyo through the center. (b) Pull and tie off the thread. (c)
9. Hand stitch the two yoyos to the front of the peplum.
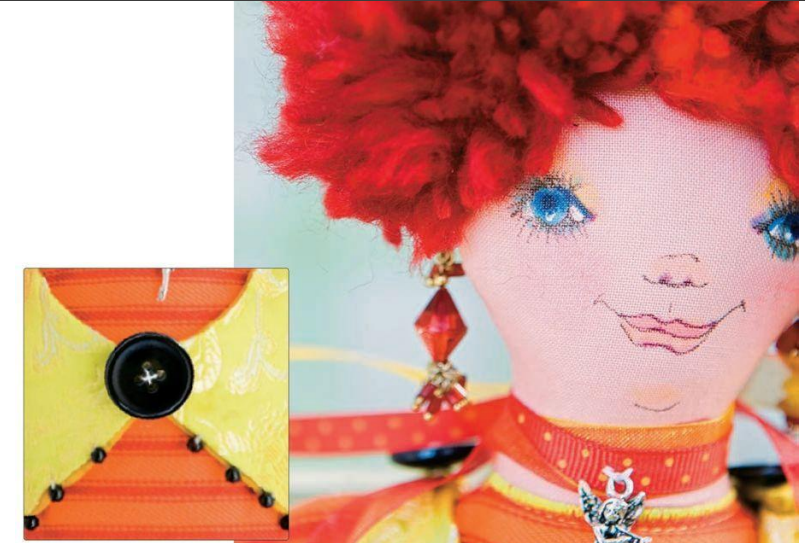
10. Refer to the illustration to draw the face on the doll. Begin by marking
the eye locations with straight pins. (K)
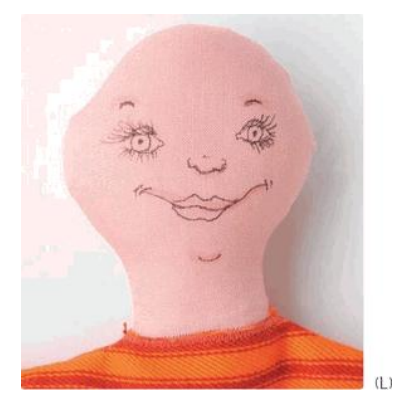
I use .03 Permawriter II in brown by Yasutomo & Co. to draw doll
faces.
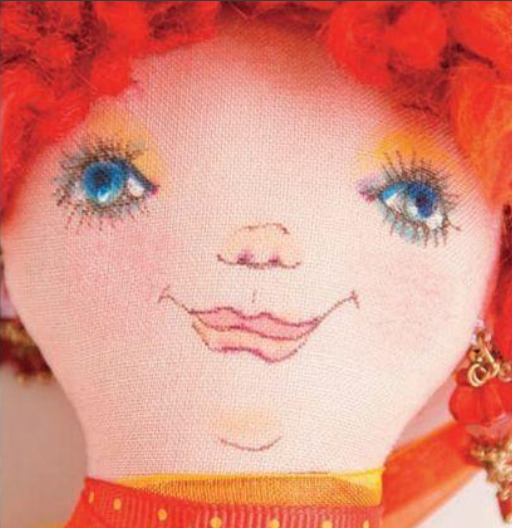
12. Next, add color with brush-tipped fabric pens, colored pencils, and
Crayola crayons. Finish with a soft fabric paint to add the whites of the eyes
and any highlights. (M)
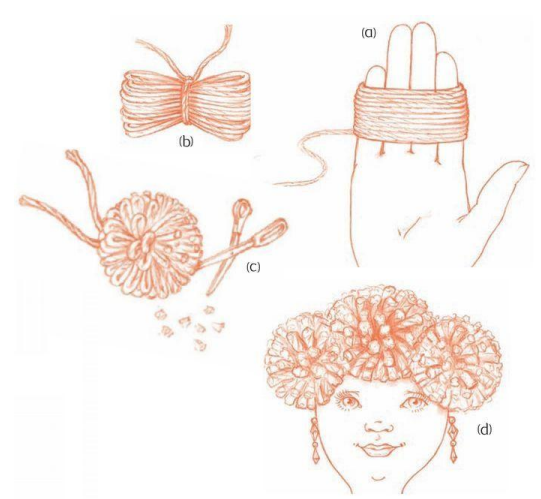
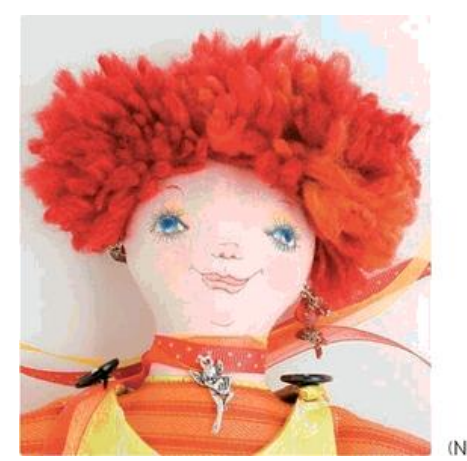
13. To wig your doll, wrap yarn over four fingers twelve times. (a) Slip the
yarn off your fingers and tie a thread around the center of the yarns; pull the
thread tight and secure it with an overcast knot. (b) Trim the ends, since this
doll likes short hair. (c) Repeat to make two more hair sections. Tack the
knotted fibers on the top of the head. (d) Again, trim
Gypsy
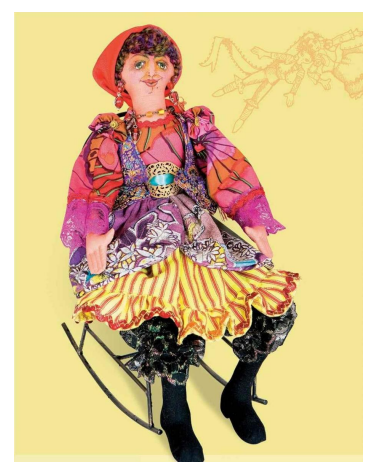
Gypsy is similar to Ginger in her simplicity, but with the addition of five
pattern pieces she can sit, cross her legs and wave her arms. Patterns for the
Upper Arm, Lower Arm, Upper Leg, and Lower Leg, which will be
connected with a flange joint, are provided. The fifth pattern piece—the
gusset, which will be added to the bottom of the body to expand its shape—
will need to be created using the stuffed body as the template. The gusset
will allow the doll to sit, and the flange joints will allow the limbs to bend
and take positions.
Additionally Gypsy has a dart in her toes that will make her feet threedimensional. You’ll also learn several costuming tricks, including tubes for
sleeves and pantaloons, a braid for wigging rather than yarn tufts, and trims
and findings that wonderfully enhance the costuming possibilities.
Material for Creating Gypsy
• ⅜ yard (34.3 cm) flesh colored body fabric
• ⅛ yard (11.4 cm) black fabric for legs and shoes
• (20″ × 10″) (50.8 × 25.4 cm) lace remnant (long edge should be
finished for bloomers)
• ⅛ yard (11.4 cm) flamboyant woven cotton blouse print
• ¼ yard (22.9 cm) each for overskirt and lining
• ¼ yard (22.9 cm) for skirt and ruffle
• 1¼ yards (1 m) metallic trim for skirt ruffle
• ½ yard (45.7 cm) trim for blouse sleeves
• ¼ yard (22.9 cm) of 1½″ (8.8 cm) -wide lace trim for blouse sleeves
• ½ yard (45.7 cm) satin ribbon for belt
• jewelry finding for a buckle
• silk scraps for vest
• 8″ (20.3 cm) tasseled scarf or handkerchief for head scarf
• beads, and bits of old jewelry for necklace and earrings
• beading needle
• #7 long darners
• matching threads for fabric and buttons
• about 12 yards (11 m) of knitting yarn for hair
• Fairfield Poly-fil
• 2 buttons for vest
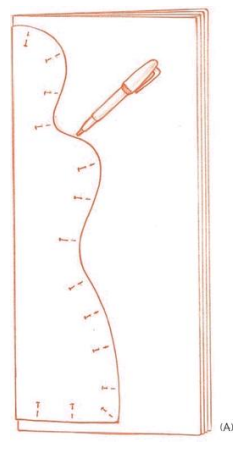
2. Fold the flesh-colored fabric in half with the right sides together, and
trace the Upper arm and Lower arm patterns two times each. Cut them out.
3. Fold the black fabric in half with the right sides together, and trace the
Upper leg and Lower leg patterns two times each. Cut them out.
4. Pin the traced appliqué pattern pieces on to their own selected fabrics.
Allow about ¼″ (6 mm) of extra fabric for an underlap at the top edge of
the tights appliqué. Cut out the appliqués; they provide a way of dressing
the doll before it is made, so you don’t have to make itsy-bitsy doll clothes
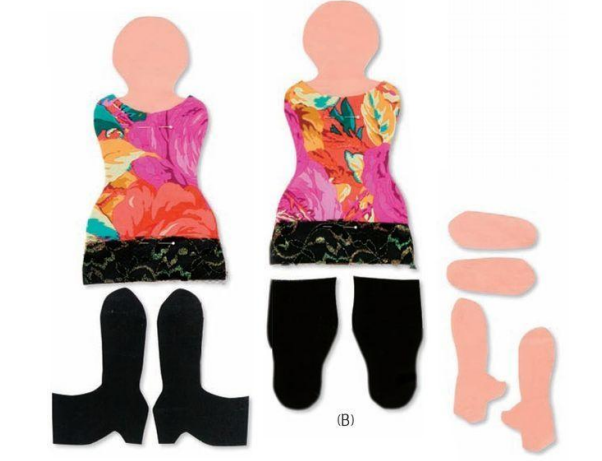
1. Staystitch the appliqué edges to the body. Refer to the patterns for
placement. (B)
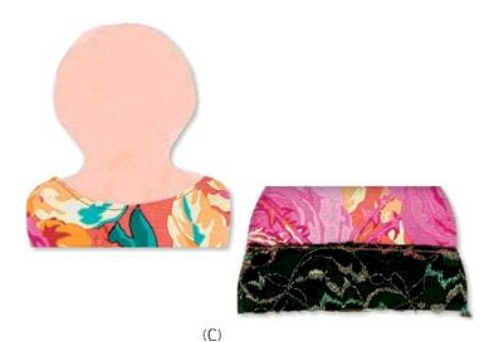
2. Cover the raw edge of the appliqué at the neckline and top of the tights by
topstitching the trim of your choice in place. (C)
3. With the right sides facing, pin and stitch the two body pieces together
with a very short stitch, leaving the bottom unstitched. Clip the curved seams
and turn the body right-side out.
4. To make the gusset pattern, lightly stuff the bottom of the doll to the
desired shape. Trace around the bottom of the doll and then add ¼″ (6 mm)
all around for a seam allowance. Cut out the gusset pattern and then cut the
gusset from black fabric and lace fabric. Baste the two layers together.
Remove the stuffing so you can stitch the gusset to the body.
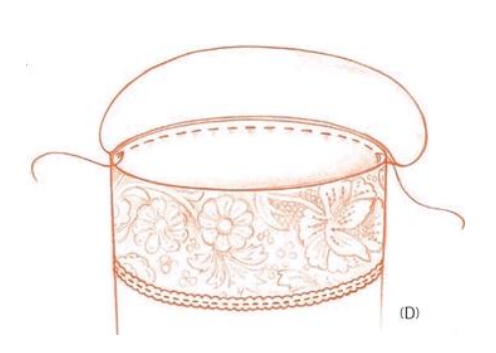
5. With right sides together, stitch the gusset to the back half of the lower
body edge, beginning and ending at the side seams. Stuff the body (page 17)
and set it aside. (D)
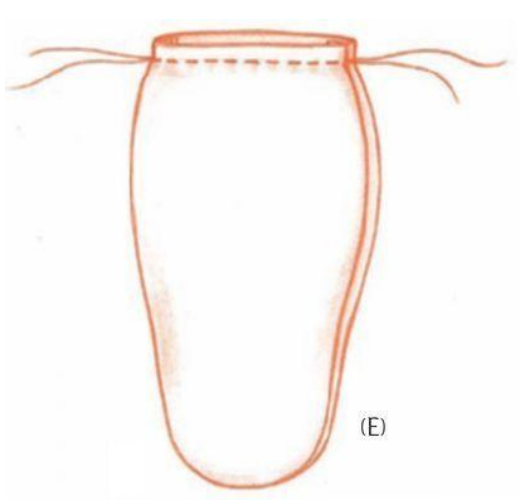
6. With the right sides facing, stitch the upper legs together and the lower
legs together as indicated on the patterns. Set the lower legs aside. Clip, turn
and stuff the upper legs. Reduce the amount of stuffing as you near the top
of the legs. Press and stitch the top edges together. (E)
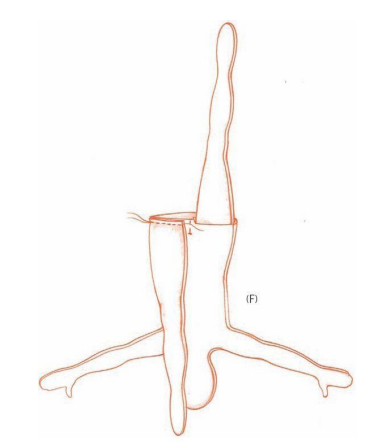
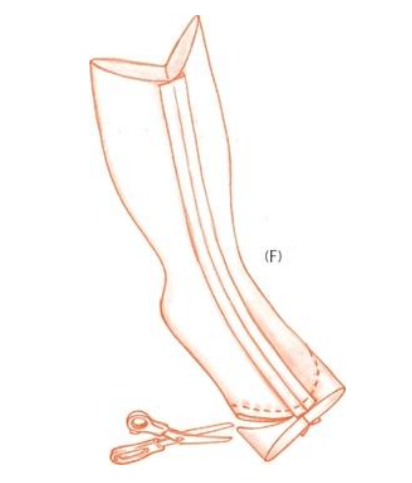
7. To shape the toes of the lower legs, press the two seams together at the toe
opening. Stitch an arc-shaped seam across the toe. Trim the excess fabric.
(F)
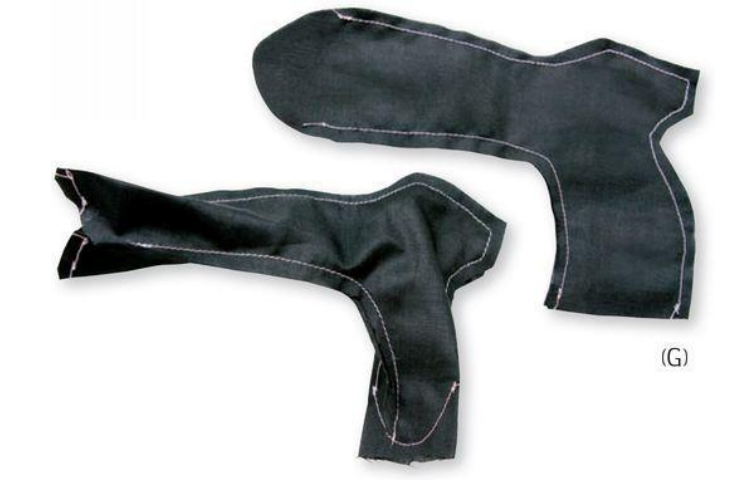
8. With the lower legs still wrong-side out, press the two seams at the top of
each lower leg together to form a U-shape. Stitch across each top edge,
leaving an opening at the center of the U-shape so you can turn the legs
right-side out as show in the photograph below. Clip the curved seam
allowances, turn the lower legs right-side out, and stuff the legs firmly. (G)
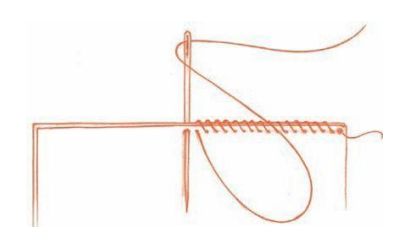
9. Stitch closed the lower legs with a hand-sewing needle and thread. Knot
the thread and begin stitching at the seam in the center of the “U.” Stitch
across one side to the tip of the joint. Repeat to close the other side. Tie off
and bury the thread.
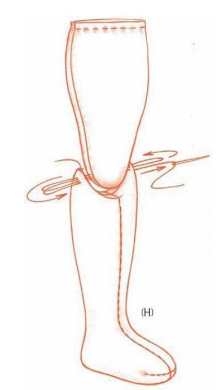
10. To join the upper and lower legs together, use a heavy thread and long
needle. Knot the thread and insert the needle so the knot is at the back of the
leg and a few threads over from the previous thread. Insert the needle
through the lower-leg flange, through the knee of the upper leg, and then
through the remaining flange. Repeat until the joint is securely in place.
Knot off, bury, and clip the thread (page 18). (H)
11. The bloomers are made from two 10″ (25.4 cm) squares of black lace.
Fold each piece of lace in half to form a tube with the finished edge
positioned at the lower tube opening; stitch the seam. Turn the tubes rightside out and hand-sew gathering stitches at the top unfinished edge. Slip the
bloomers over the legs and pull the gathers at the top edge so the bloomers
are snug to the top of the upper legs. Tie off the threads. Staystitch the
gathered lace to the leg.
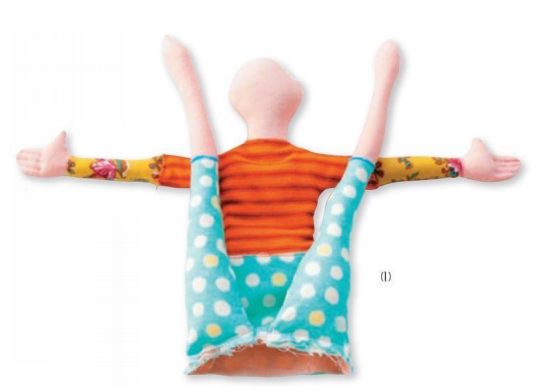
12. Pin the upper legs to the front of the doll body so the cut edges are
aligned; stitch. (The photo below shows how this is done on Ginger.) Stuff
the doll body firmly, especially at the neck. Pin and hand stitch the bottom
closed, using the ladder stitch. Set the body aside. (I
13. A tab joint made from the flesh-colored fabric and the blouse fabric will
be used to attach the arms to the body. Cut a piece of each fabric 1″ × 2″ (2.5
× 5.1 cm). (a) With the right sides together, stitch the two pieces together
along the 2″ (5.1 cm) side, and press the seam open. (b) Cut this piece in
half, across the seam. (c) Fold each 1″ x 2″ (2.5 × 5.1 cm) piece in half
lengthwise, with the right sides together. Stitch them along one short edge
and the long edge, as shown. (d) Turn the ½″ × 2″ (1.3 × 5.1 cm) tabs rightside out, fold the raw edges in, stitch them closed and set aside. (e)
14. With the right sides together, stitch the upper arms. The shoulders will be
a little wider than the elbows. Make a small slash as indicated on the pattern
piece through one fabric layer. Use the slashed opening to turn the upper
arms right-side out. Stuff the arms, and close the slashed openings with the
ladder stitch. (J)
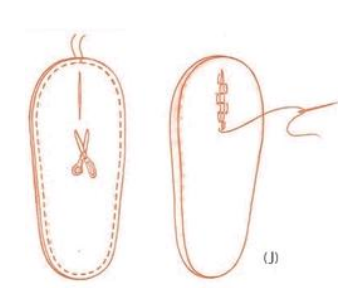
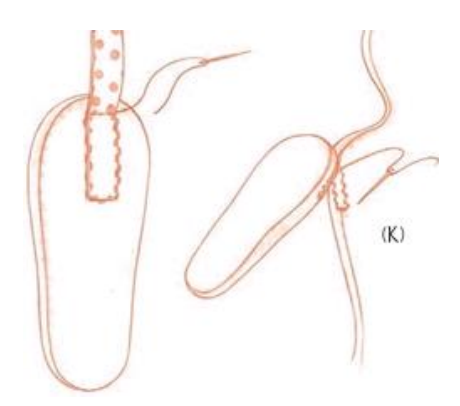
15. Hand stitch the flesh end of a tab joint over the slash stitching on each
upper arm. Fold the tabs back on themselves, and then pin the blouse ends to
the body at the shoulders. Use the ladder stitch to join the tabs all the way
around, including the folded edge, to the body. (K)
16. With the right sides together, stitch the lower arm, leaving it open where
the pattern indicates. With the arm still wrong-side out press the two seams
together at the top of the elbow, so the top of the lower arm forms a U-shape.
Stitch across the top of the arm, leaving an opening at the center of the “U”
Clip the seam allowance in the curved area, turn the arm right-side out, and
stuff the hand lightly. Repeat for the other lower arm.
17. Topstitch the fingers starting at the center stitching line, and then sew the
two remaining stitching lines. Continue stuffing the lower arm firmly. To
close the joint by hand, start the ladder stitch at the seam in the center of the
joint and then stitch to the tips at each side of the joint. Tie off and bury the
thread. Don’t forget to paint her nails!
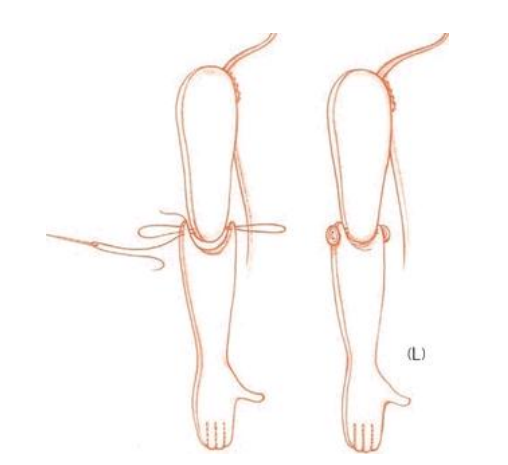
18. With a new, knotted thread, insert the needle so the knot is at the outside
of the arm (with the thumb pointing toward the front of the body) and a few
threads over from the previous thread. Insert the needle through the flange,
then through the elbow of the upper arm, and through the remaining flange.
Repeat until the joint is securely in place. Knot off, bury, and clip the thread.
Sew buttons to each side directly over the stitching. (L)
1. Press a ½″(1.3 cm) hem on one edge of each sleeve piece so the right
sides are together. Stitch the 1½″ (3.8 cm) -wide pregathered lace on the
upturned hems and then topstitch trim over the seams. (M)\
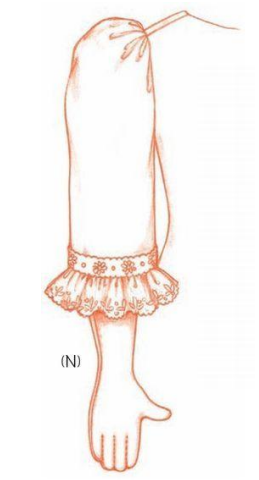
2. With the right sides together, stitch the two unfinished edges to form a
tube with the lace edging on the bottom of the tube. Repeat with the
remaining piece. Turn the sleeves right-side out and gather the top edge by
hand. Slip the tubes over the arms, and pull the gathers so the tops of the
sleeves are snug to the shoulders. Tie off the threads. (N)
3. Make four yoyos from the blouse fabric (see page 30). With the right side
of the fabric facing up, fold over a tiny hem. With a knotted, heavy thread
and the #7 long darner, sew the hem with a gathering stitch. Draw the
gathers together and bring the needle to the back of the yoyo through the
center; pull and tie off the thread. Place a button or ribbon flower at the
center of the yoyos, and stitch them to the shoulders of the doll on the
blouse.
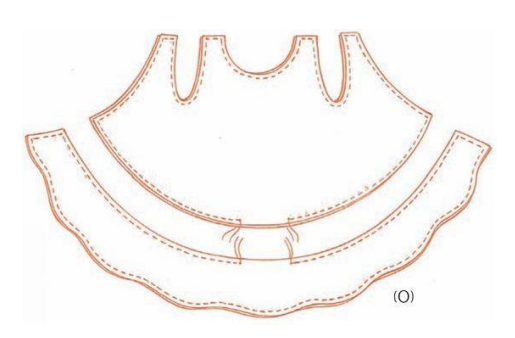
4. With the right sides of the vest and lining fabrics together, stitch the vest
as indicated, leaving a break in the stitching. (O) Clip the curved sections of
the seam allowance, turn the vest right-side out and press. Repeat with the
ruffle fabric pieces. Close the openings by hand with the ladder stitch (page
18)
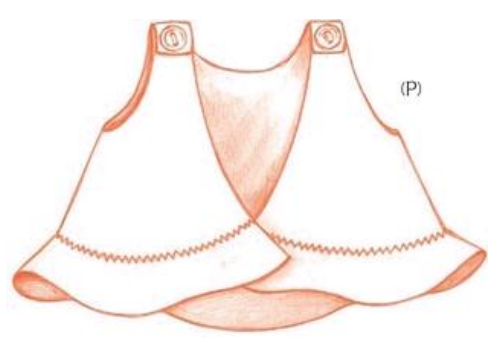
5. Use a zigzag stitch to join the ruffle to the vest at the bottom of the vest.
Overlap the shoulder tabs from back to front and tack them in place. Sew on
buttons, if desired. (P)
6. To make the overskirt, with the right sides of the fabric and the lining
together, stitch the bottom edge and up to the marking on the open side.
Clip the seam allowances, turn the overskirt right-side out and press. Set the
overskirt aside.
7. To make the skirt, cut fabrics as indicated in the cutting list on page 34.
Press up (with right sides together) a ¼″ (6 mm) hem on one of the 45″
(114.3 cm) -long edges of the ruffle. Topstitch the metallic trim over the
hem edge. Gather the opposite edge to fit the 22½″ (57.2 cm) skirt. Pin and
stitch gathered ruffle to the bottom edge of skirt with right sides together
and raw edges aligned. Press seam allowances toward skirt and topstitch
seam allowances in place so they lay flat. (Q
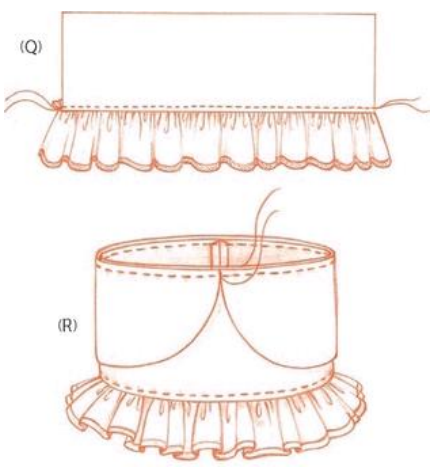
8. With right sides together, stitch short edges of skirt and ruffle to make a
center-back seam. Position center of overskirt at the skirt center-back seam
so the shaped fronts meet in the center, as shown. Gather top edge of the
skirt with ¼″ (6 mm) stitches and heavy thread. Pull thread to gather the top
of the skirt so it fits around the waist of the doll. Knot off threads and tack
the skirt in place around the waist of the doll. (R)
9. Cover the waist with the 2″ (5.1 cm) wired ribbon, and then attach a
decorative jewelry finding as a buckle. Position the buckle at the front of
the skirt and make a bow at the back.
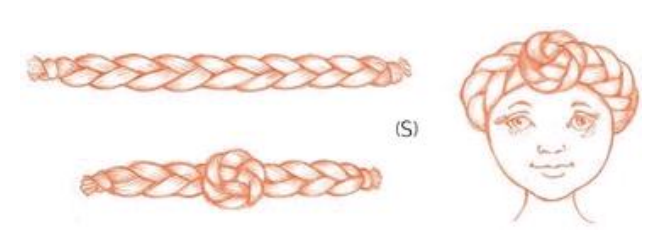
10. Braid about twelve arm’s-length pieces of 4-ply yarn and knot them at
both ends with a slipknot. Also, tie a slipknot in the center of the braid.
Place the center knot at the center of the forehead, wrap the braid around
the head, and hand tack it in place. (S)
11. Tie an old silk scarf with tassels, a hand- kerchief, or an 11″ × 8″ (27.9 ×
20.3 cm) remnant over her head; tack it in place. Sew beads on her head for
earrings and an old necklace around her neck. (T)
file:///C:/Users/jacki/Downloads/_OceanofPDF.com_Cloth_Doll_Workshop__From_the_Beginning_an_-_Patti_Medaris_Culea.pdf
Discover more from Jacki Kellum
Subscribe to get the latest posts sent to your email.