
Wild Rose Design
Embroidered with Long & Short Stitches

Easter Lily Design
Embroidered with Long & Short Stitches
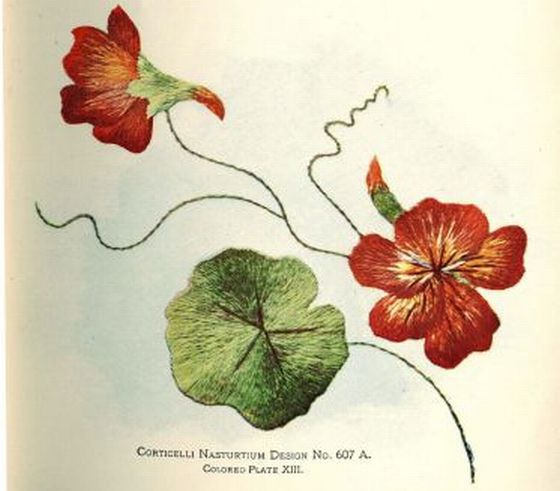
Nasturtium Design
Embroidered with Long & Short Stitches

Bachelor’s Button Design
Embroidered with Long & Short Stitches

Clover Design
Embroidered with Long & Short Stitches

Buttercup Design
Embroidered with Long & Short Stitches

Chrysanthemum Design
Embroidered with Long & Short Stitches

Carnatian Design
Embroidered with Long & Short Stitches
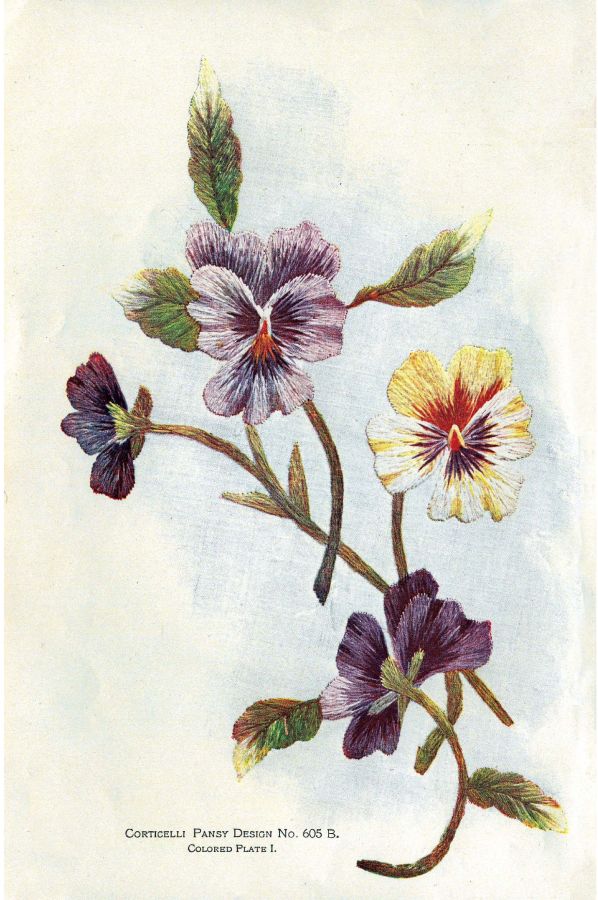
Pansy Design
Embroidered with Long & Short Stitches

Daisy Design
Embroidered with Long & Short Stitches
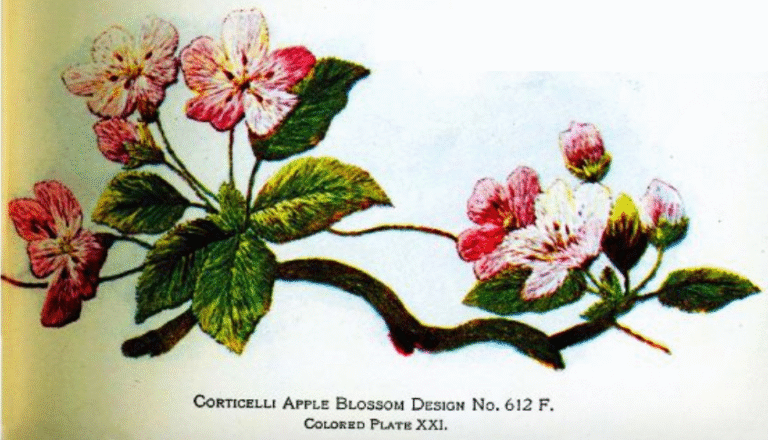
Apple Blossom Design
Embroidered with Long & Short Stitches

Yellow Rose Design
Embroidered with Long & Short Stitches

Sweet Pea Design
Embroidered with Long & Short Stitches
How to Sew the Long and Short Stitch in Embroidery

“To make the stitch, bring the needle up on the outline of the design and send it down within the form. … Let the first stitch be a long one, one-quarter of an inch to an inch in length in proportion to the size of the form.
The next stitch should be but two-thirds as long and should lie parallel with the first or closer to it within the form,… The contour of the design must decide the stitch direction.
“The third stitch should be long, followed by a short one, and so on alternating long and short. We are sometimes told that these stitches should be “irregular.”
B. Feather Stitch.—The next step is to lay another row of stitches over these, differing from them in that they shall be long and short on both edges. The long stitch should commence just below the outline and should end further within the form than any of the first row. It should be taken in exactly the same direction as the first row and over them. The next stitch should be started below the first, something less than a third of its length, just beside it, and should reach the same distance below the end of the first. The third should be similar to the first, and so on. It is obvious that every other stitch of this second row is the long one at its start and the short one at its finish. The second row is the same as the first, except that it is long and short on both edges….The more regular and the more accurate the alternating is, the smoother the surface will be.
The colors are to blend instead of appear as rows
“This second row should lap well over the first. It should indeed cover two-thirds of it if the colors are to blend instead of appear as rows. This is the secret, or rather, the real principle of shading. It will not do to economize material and expect a rich result. This is likely to be the fault of American embroidery. The preceding rows of stitches must be solid under the succeeding ones. There may be as many rows as are necessary to cover the form, and these should all lap deep over each other so that the under rows show only because of the difference in length of the stitches of the upper edge of the over rows. In this way one shade passes into the next as tones in painting, perfectly clear in themselves yet, because they are distinct, making a luminous and unbroken whole. If the stitches are not placed according to such a method the effect will be—again as in painting when the colors are muddled—broken and harsh and expressionless. By this means shades that differ greatly can be blended and the whole is brought into relief by the raising of one row over the other. The lower ends of the stitches of the last row may adapt themselves in terminating to the form. See Fig. I b.” Corticelli Home Needlework
Discover more from Jacki Kellum
Subscribe to get the latest posts sent to your email.