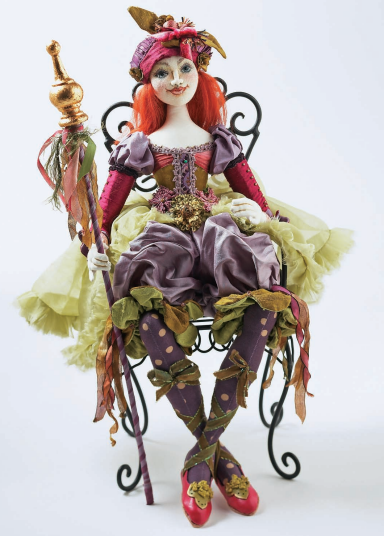
Danielle Cloth Doll by Barbara Willis
26″ Tall – Advanced Level
Image Credit Barbara Willis ain Her Book Cloth Doll Artistry
[In the same book, Willis shares how to create the less difficult Jolie Doll. Both dolls are clothed extravagantly, and one doll is large, while the other is short. But the main differences lie within whether the faces are sculpted or not.]

Jolie Cloth Doll by Barbara Willis
14″ Tall – Beginner Level
Image Credit Barbara Willis in Her Book Cloth Doll Artistry

And in the same book, Willis shows us how to make elaborate paper dolls.

Gabriella Paper Doll by Barbara Willis
18″ Tall – Very Beginner Level
Image Credit Barbara Willis in Her Book Cloth Doll Artistry
{As I am reading Willis’s doll books, I am recalling a lesson that I learned at least 30 years ago. Making cloth dolls is a tedious task. My advice to a beginner in this field is to take the task slowly, in small bites. I heartily recommend celebrating fibers in some less demanding projects — as you take on the full dolls in bits and pieces. Take a peek at my post about creating Cloth Doll Journals, Clothed Paper Dolls, and Color Boards. In my opinion, that is a delightful place to start. In the words of someone long ago and far away: “A spoonful of sugar helps the medicine go down.” Mary Poppins
And creating an advanced cloth doll seems to me like swigging a bottle of castor oil. And yet, something about me loves working with the human form:
Cloth Doll Journals, Reinvented Paper Dolls, & Other Celebrations of Fibers
[Most of the above post comes from earlier sections of this book where Danielle is created: Cloth Doll Artistry, which every potential doll maker should have in his collection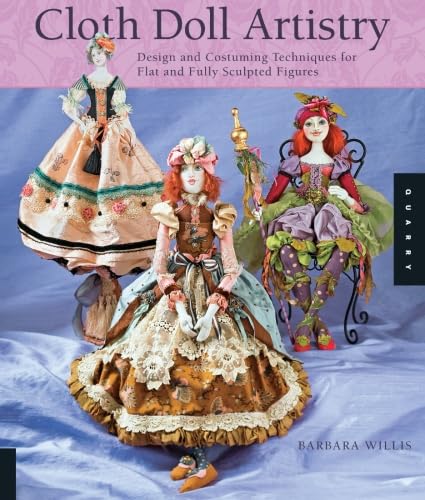 .
.
The Barbara Willis Book Cloth Doll Artistry is collegiate in its scope–it should be the textbook for a college level study of the field of making dolls–all kinds of art dolls. Take this final bit of advise from a seasoned book skimmer. Don’t skim Barbara Willis’s Books. She is a consummate teacher. Savour every word she writes and sniff the roses along the way.
As I am nearing the final chapter of my study of Willis’s Book Cloth Doll Artistry, I see that the author’s careful discussions about Color Boards in the early parts of the book seam beautifully into her collections of material for her fully developed dolls at the end:
What Is A Color Board for a Doll?
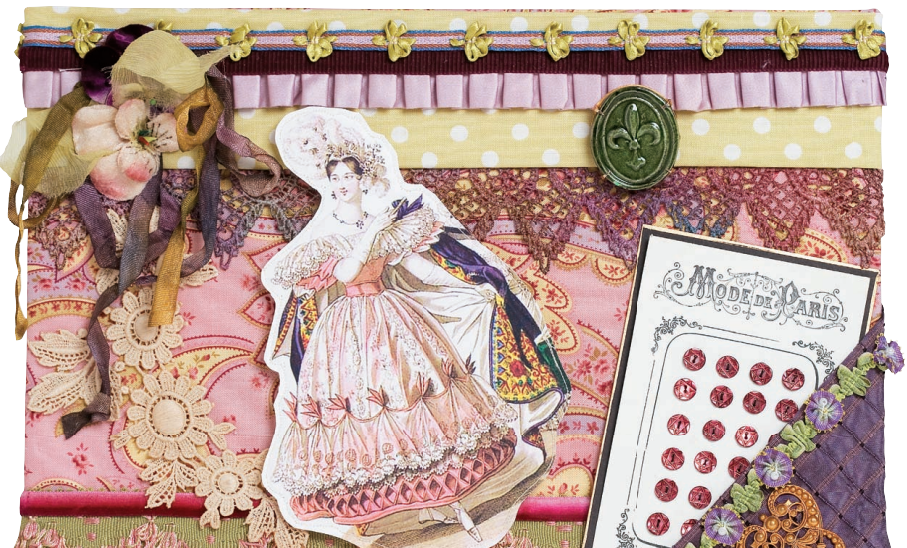
A Romantic Color Board by Barbara Willis
Barbara Willis is a masterful color board maker. but she asked buddies to explain what a color board is:
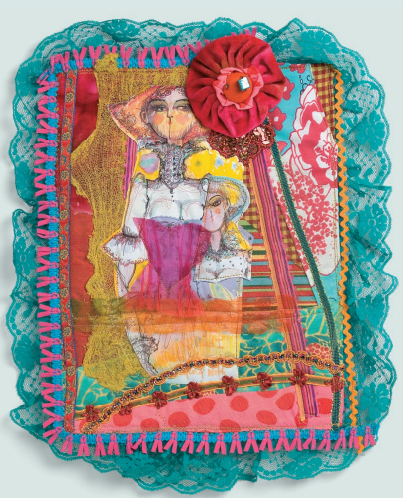
Color Board
By Elinor Peace Bailey
“A complex display of fabric that leaves you breathless is what we’re looking for here.
Because the doll form lends itself to a painterly layering of color and texture, it is a grand home for excess—so I play with ruffles and flourishes, layers and transparencies, tiny details, and overall appearance. I never tire of seeing a completed form
that has been spared nothing. To withhold some treasure will kill the piece. If using what you have is an excuse rather than a bragging point, then get better stuff! Like a magpie, collect what delights your eye from thrift stores, garage sales, quilt shops,
and craft stores. A doll is a small object; she can hold a bit of the best.
I start with a complex color palette drawn from what I call a mother print, a main print from which everything else departs. I hope to find at least twelve colors in the mother print in order to have the greatest number of possibilities. Then I begin looking for things that sing when they are with that piece of fabric. I add until I am sated. Now, all of that pile might not be part of the fi nished
piece, but it is all there for the audition. In this instance, I
started with a vivid stripe and then grabbed as many textures as I could in about fi ve minutes. I allow very little pondering time. Now, if you will excuse me, I am off to make a doll!” elinor peace bailey

Barbara Willis Basket of Materials Collected for her doll Jolie
“…keep in mind that the treasure hunt for ideas and materials is as much fun as the designing. Building a worthy stash of fabrics, notions, and trims to pull from is a delightful part of cloth doll making. If you are wondering if your doll will have the right trims, the answer is yes—because you pick what you like—the colors, textures, and styles that draw you in. Local craft stores, scrapbook stores, and fabric shops have heaps of stuff just waiting to go home with you. If you love vintage, th en flea markets, garage sales, and thrift stores should be the focus of your gathering.” Barbara Willis
.The techniques used to create Danielle are more advanced than those used to make the other dolls presented in this book. Danielle is a seated doll. Her body parts were designed for a permanent seated pose, unlike Jolie, who is flexible at her joints.
Danielle has button-jointed hips and shoulders, wired hands, and a face created by soft-sculpting knit fabric.
Soft sculpting is a technique that takes time and practice to develop. Embrace the learning curve and experiment with several kinds of knit fabric. Keep in mind that we are processed-oriented here. It is the process that provides the challenge sense of accomplishment and ultimate joy.
Choosing the right fabrics for your doll will greatly affect your
results. Knit fabric is essential for Danielle’s face, and for successful soft sculpting of her face. I recommend a two-way stretch cotton Lycra blend; the Lycra offers memory, and the
cotton fi bers offer a nice matte finish The cotton fibers dye beautifully while the Lycra is resistant to color, so the blend offers soft, pleasing results. T-shirt and silk knits also work fi ne if that’s your preference.
Look for knit fabrics with a smooth texture with no obvious
slubs. You can dye white knit fabric ivory with a commercial dye to match ivory fabric for the torso and hands (page 76).
As previously discussed, you might want to dye your knit
fabric to get a precise color. I like working with Rit dye, which
is widely available in the United States and Australia, and Dylon
dye, which is available in the United Kingdom.
Refer to the dyeing instructions on the dye package, keeping
in mind that results will vary depending on the amount of
fabric you are dyeing, its fi ber content, the temperature of the
water, and the length of time you leave the fabric immersed in
the dye bath.
–How to Dye Fabric in a Washing Machine with Rit Dye
The following instructions are for dyeing fabric in a washing
machine with a combination of yellow and tan Rit dye powders
to create an ivory color.
1 Prewash, rinse, and spin the knit fabric in your washing
machine. Remove the damp fabric and set it aside. Do
not dry it.
2 Set your washing machine for hot water and a small size load.
3 Add ½ teaspoon (2 g) tan powder dye and ½ (2 g) teaspoon yellow powder dye to the water. Agitate the water to mix the dyes.
4 Test the color by dipping a small strip of fabric into the
dye bath. For a darker color, add more dye. For a lighter
color, add more water.
5 Immerse the damp knit fabric in the dye bath and
leave it in until it is the desired color. Once the fabric is the perfect shade, remove it from the washing machine and set it aside.
6 Spin the colored water out of the washing machine and
refi ll it with hot water.
7 Immerse the dyed fabric in the hot water and set the
washing machine to spin to remove all the excess water.
8 Dry the fabric in the clothes dryer at a hot setting
Woven fabrics are used for the construction of Danielle’s arms, legs,mand torso. I often choose colorful cottons, silks, and even velvets for some parts of the body. Danielle’s upper
arms are made from a beautiful mauve dupioni silk and her is moss-green silk velvet. Silk and velvet can be a bit fussy. Always allow extra seam allowance for dupioni silk.
If you also choose to use silk velvet for the torso, iron on a fusible stabilizer to the backside of the fabric.
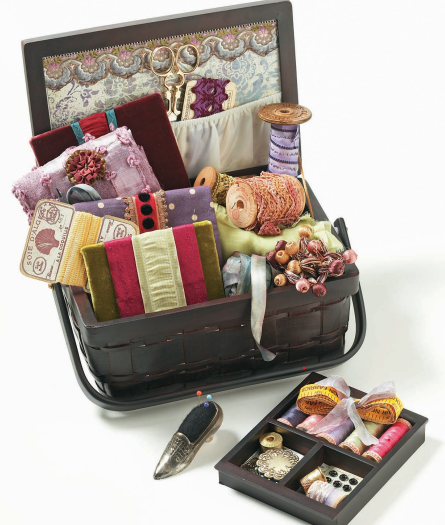
Materials
• 1⁄3 yard (0.3 m) woven fabric for the legs
(I used polka-dot cotton)
• ¼ yard (0.25 m) woven fabric for the upper arms
(I used mauve dupioni silk)
• ¼ yard (0.25 m) woven fabric for the lower torso
(I used moss-green silk velvet)
• ¼ yard (0.25 m) ivory woven cotton fabric for
the hands and upper torso
• ¼ yard (0.25 m) ivory cotton Lycra knit (with two-way
stretch) for the face
• ½ yard (0.5 m) silk organza for the side fl ounces
(I used moss-green silk organza.)
• 1/3 yard (0.3 m) silk dupioni for the pantalets and
upper puff sleeves, wrong side sleeve cuffs (I used lavender
silk dupioni.)
• ¼ yard (0.25 m) silk dupioni for the sleeve cuffs and hat(I used raspberry dupioni.)
• ¼ yard (0.25 m) each of moss-green and bright green
dupioni silk for the knee scallops
• cotton-wrapped polyester threads to match fabrics
• heavy nylon upholstery thread
• bag of fi berfi ll, such as Fairfi eld’s Soft Touch Supreme
• white and light blue or green gel pens
• colored pencils, two lip colors and dark gray
• black, brown, and green Pigma pens, 005 or 01 tip,
such as Sakura Micron Pigma Pens
• powdered, colored eye shadows and blushes
• fl at ½” (1.3 cm), stiff brush for blending powders
• spray art fi xative, such as Krylon
• tacky glue
• clear fabric glue, such as Fabri Tac
• 2 chenille stems • 2 5
⁄8″ (1.6 cm) buttons for shoulder jointing
• Two 1¼” (3.2 cm) buttons for hip jointing
• tan and yellow fabric dye, such as Rit or Dylon (optional)
• hair fi bers
• small black glass beads for eyes
• ribbons, trims, laces, beads, buttons, pompoms,
baubles, and charms
• small pieces of thin leather or Ultrasuede in 2 or 3 colors
for the shoes
• small piece of heavy leather for the soles (old belts work
well here)
• small piece of poster board for inner sole material
TOOLS
• sewing machine
• open-toe appliqué foot
• straight pins
• sharp scissors
• makeup sponge wand applicators
• short liner brush
• measuring tape
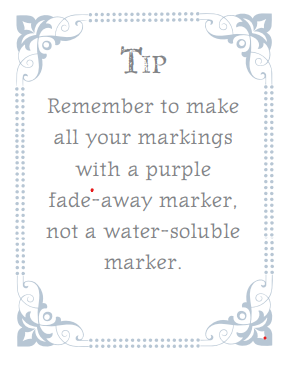
• disappearing ink fabric marker (purple fade-away)
• mechanical lead pencil
• 6″ (15.2 cm) metal hem gauge with slide indicator
• straight-nose hemostats
• stuffi ng forks, regular and mini
• 1/8″ (3 mm) brass turning tube and rod
• long darners #7, such as John James, for soft sculpting
the face
• 5″ or 7″ (12.7 or 17.8 cm) doll needle
• steam iron
• spritz bottle with water
• hand sewing needle
• emery board
• screw punch
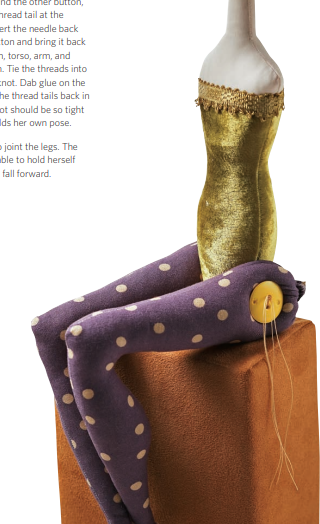
String and Button Jointed Arms and Legs
Tips for Sculpting a Cloth Doll Face
• One oval of fabric will make one head.
• Sculpting is done with side-to-side stitches not back-to-front or top-to-bottom stitches, unless otherwise directed.
• Do not stitch diagonally through the head, unless
directed to do so, as crosstension will distort the shape
of the head and face.
• The thread and most of the stitches will lie beneath the
fabric, inside the head and not on the surface of the face,
unless otherwise directed.
• Change the thread on the needle frequently so it doesn’t
break. Work with cotton-wrapped polyester or 100
percent polyester thread and a sculpting needle.
• Work with a single thread throughout the entire
sculpting process.
• Take care not to push the fabric down or compress
it with your fi ngers during stitching. This could embed the needle and thread deep in the stuffi ng, which would
distort the facial features.
• Use the top of the needle like a digging tool when directed,
to move and manipulate the stuffi ng forward. Dig and pull the stuffi ng toward the surface of the face to create
a small mound of compacted stuffi ng for the nose, nostril
fl ares, cheeks, lips, and chin \\when directed. If you dig too
deep, the mound will appear swollen; if you go too shallow,
there will be no dimension.
• Practice sculpting on those multiple heads you made earlier
Sculpting the Face
To sculpt the face, use regular-weight cotton-wrapped polyester thread and a sculpting needle. I recommend the John
James brand #7 long darning needle. It’s flexible and long enough to pass through the doll head, but it won’t make holes in the fabric. Change the thread often, because it tends to wear and fatigue as it passes through the fabric so many times.
Work with a single length of knotted thread; a double thread will make bigger holes in the face
Preparing the Face and Head for sculpting
1 Draw a line across the face from ear
to ear with the purple fade-away marker, to
quarter the face.
Refer to the illustration and mark the placement dots and
circle on the face (M)

Note: #6 and #8 are the same hole as
are # 5, 9 and 11. This is numbered so
we can followed in numerical sequence

Photo Guide 1

Nose Sculpting,
Photo Guide 2
•Anchor the thread with two or three straight stitches in the back of the head near the closed hole.
• Insert the needle in the back of the head and bring it out the front of the head at marking #1.
• Reinsert the needle at marking #1, one or two threads of fabric away from the exit hole. Scoop a bit of stuffi ng so it is under the needle and exit at marking #2. The deeper you scoop, the broader • Re-enter at marking #2, scoop, and exit at marking #3.
• Re-enter at marking #3, scoop, and exit at marking #4.
• Re-enter at marking #4, scoop, and exit at marking #5.
• Re-enter at marking #5, scoop, and exit at marking #6.
• Pull the stitches taut to form the beginnings of a nose bridge. Dig beneath the circle again with the tip of the needle to retrain the nose bump.
• Re-enter at marking #6, bring the needle straight down, and exit at marking #7.
• Re-enter at marking #7 and bring the needle straight back up to exit at marking #8
.• Repeat the last two steps, stitching from marking #6 to #7 and back to #8 to hold the thread tension.
• Re-enter at marking #8 and exit at marking #9.
• Re-enter at marking #9 and bring
the needle straight down and exit at
marking #10.
• Re-enter at marking #10 and exit
at marking #11.
• Repeat the last two steps, stitching from marking #9 to #10 and back to #11 to hold the thread tension.
This section of stitching is numerically
out of order, but it will permanently
anchor the stuffi ng into the nose bump.
• Pierce the fabric with the tip of the
needle and pull the stuffi ng forward
behind the nose circle to fi ll it out
completely. This will be the fi nal shape
of the nose.
• Insert the needle in marking #11
and out at marking #7.
• Re-enter at marking #7 and exit
at marking #11.
• Re-enter at marking #11 and exit
at marking #8.
• Re-enter at marking #8 and exit
at marking #10.
• Re-enter at marking #10 and exit
at marking #8. Re-enter at marking #8
and exit at marking #5.
• If any of the stitches slipped or seem
incorrect, re-enter through any marking
and restitch to correct the tension and
shape of the nose.
• To change the thread, bring the
needle through to the back of the head
and knot off the thread behind one of
the eyes without pulling or creating
tension on the thread. Start a new
single, knotted thread by anchoring a
few stitches on the back of the head.
Bring the needle out at marking #5 (O).

• Follow the stitching illustration to the
right for stitch placement between the
previous stitching to narrow and fi nish
the bridge of the nose. Anchor the
tension, re-enter at marking #5, and
exit at marking #6
• From marking #6, follow the grey
dots in the illustration below, and
stitch in between the original stitches
that form the bridge of the nose (6–1),
ending at marking 1.
• Bring the needle to the back of the
head and anchor off the tension.
• Bring the needle through the head
at #6.
• Re-enter at #6 and come out at #5.

Photo Guide 3
Sculpting the Nose
Attaching the Hair to Danielle’s Head

How to Make Doll Hair Out of Tibetan Fur
To use Tibetan fur cut a strip of skin/hair approximately 2″ × 4″ (5.1 × 10.2 cm). Tacky-glue the strip in half lengthwise,wrong sides together. Apply the tacky glue to the doll head just along the hairline from above eye level all along the nape of the neck in a big U shape behind the head.
Attach the edge of the skin/hair strip over the glue. You need not cover the back of
the head because it will be covered with a stunning hat; the hair would add unnecessary bulk (V)

Making the Hat
The hair must be on the doll (page 95) before you start the hat; otherwise, the hat might be too small. The thickness of the hair determines the correct hat size.
1 Fold the chosen hat fabric, preferably silk dupioni, in half, right sides together, and trace the hat brim pattern on it twice.
2 Stitch directly on the traced line, leaving an opening as indicated on the pattern. Cut out the pieces with a generous ¼” (6 mm) seam allowance.
Turn the hat brims right side out.
3 Finger-press and whipstitch the openings closed. Place one hat brim on the front and one on the back of the doll’s head, overlapping to fi t snugly. Take them off, and tack them securely together. Sew buttons, small fl owers, or beads at each side to cover the stitching.
4 Cut a rectangle of the same fabric to approximately 2½” × 6 3
⁄4″ (6.4 × 15.9 cm) for the crown of the hat. Fold it in half, right sides together, and stitch a center seam as shown. Hand-sew
a running stitch ½” (1.3 cm) from the top raw edge with heavy
upholstery thread, leaving long tails
5 Pull the threads to gather the crown,tucking the raw ends to the inside asyou go. Knot off the thread securely and bury the thread tails. Turn the crown right side out. Finger-press a small hem at the bottom edge to the wrong side

Making the Pantalets and Knee Scallops
Discover more from Jacki Kellum
Subscribe to get the latest posts sent to your email.