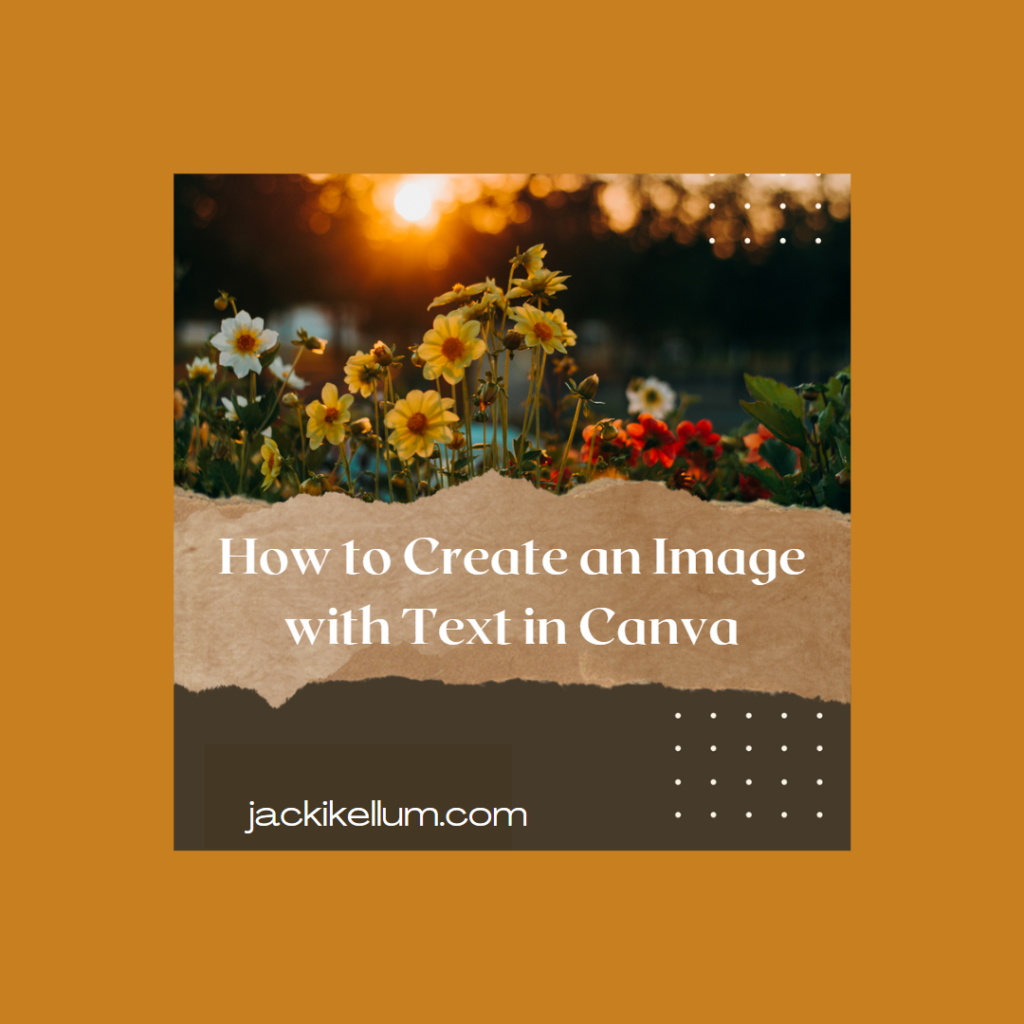
In this post, I will show you how to create an Instagram Post with images and text in Canva.
Before I begin this tutorial, I feel the need to tell you that I have been using the Adobe Suite for many, many years. I thought I’d never say this, but Canva is an affordable and user-friendly alternative to Photoshop. Canva has become my go-to option for creating images for social media.
Now, join me as I show you, step by step, how to create the following Instagram post.

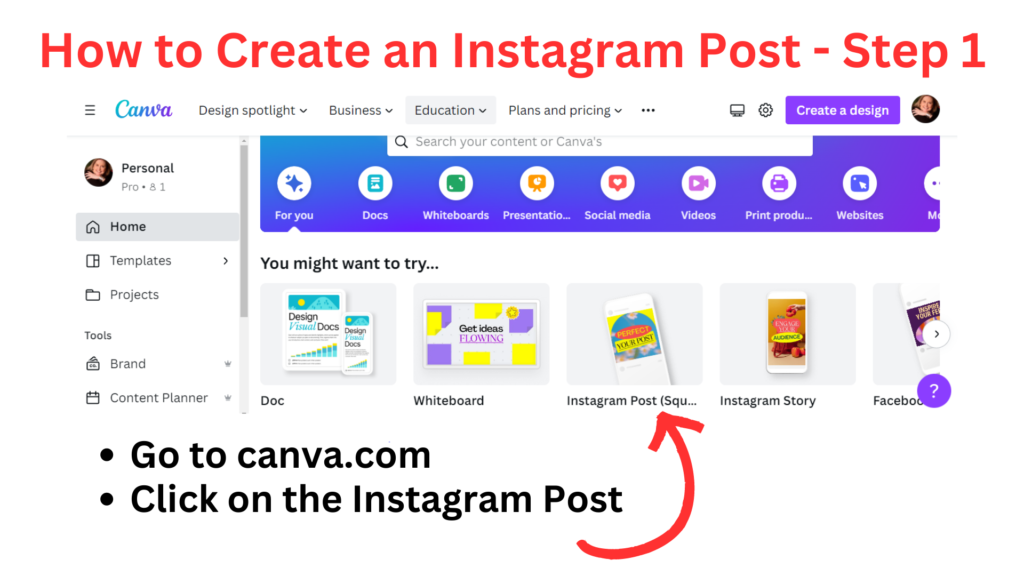
Go to canva.com
Some of Canva’s features are free. I advise you to pay for the pro version of Canva. A Canva subscription is a bargain, compared to the price of subscribing to Adobe Photoshop. I am hardcore. I subscribe to both Canva and Photoshop. For most people, Canva is more than adequate. Photoshop is a more sophisticated image editor than Canva, but Canva supplies its users with tons of free and perfect photos. Yet, you can also upload and use your own images in Canva.
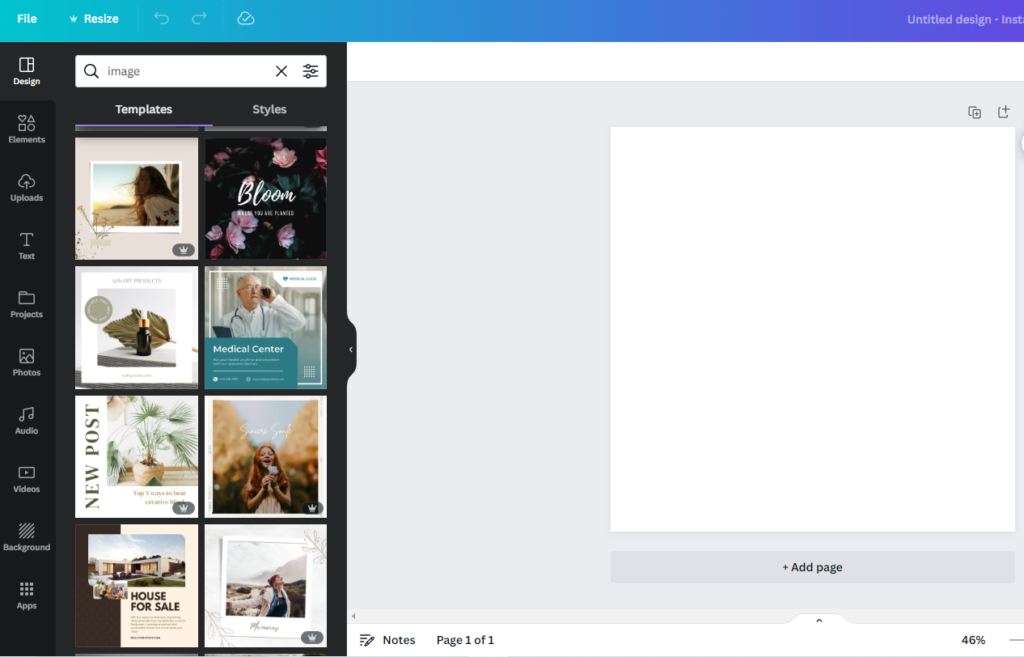
2. Canva has several templates. For this tutorial, type the word image in the search window:
3. Scroll down the possible templates [on the left]. Don’t worry about the text or the image. Just look for a layout you like.
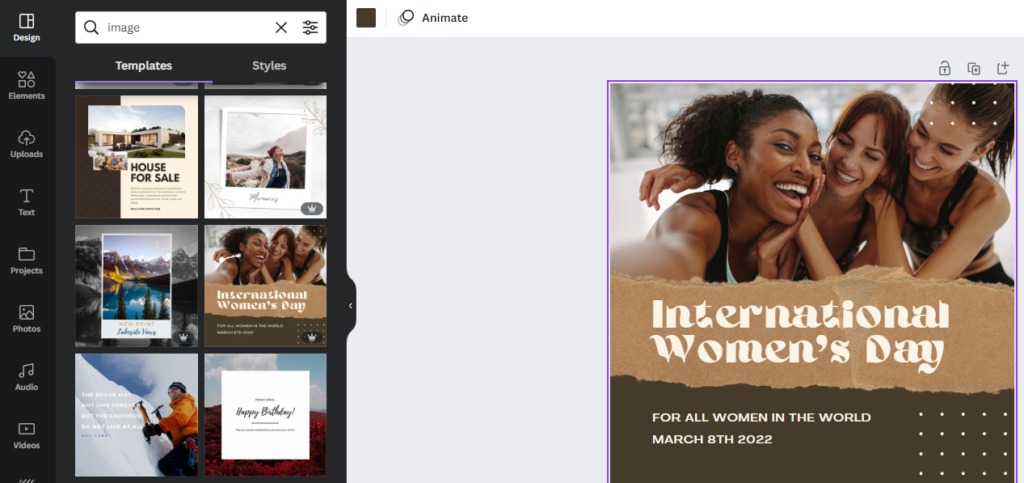
4. I like the layout in the above template. I click on it and drag it into the white workspace on the right.
5. I’ll begin to edit the template to suit my own needs. I want to use a different image. I click on the image that was there and delete it.
6a. On the far left panel, I click the word “Elements.”
6b. Near the bottom of the options, I click on the selection of Grids. I select the single-image placement grid.
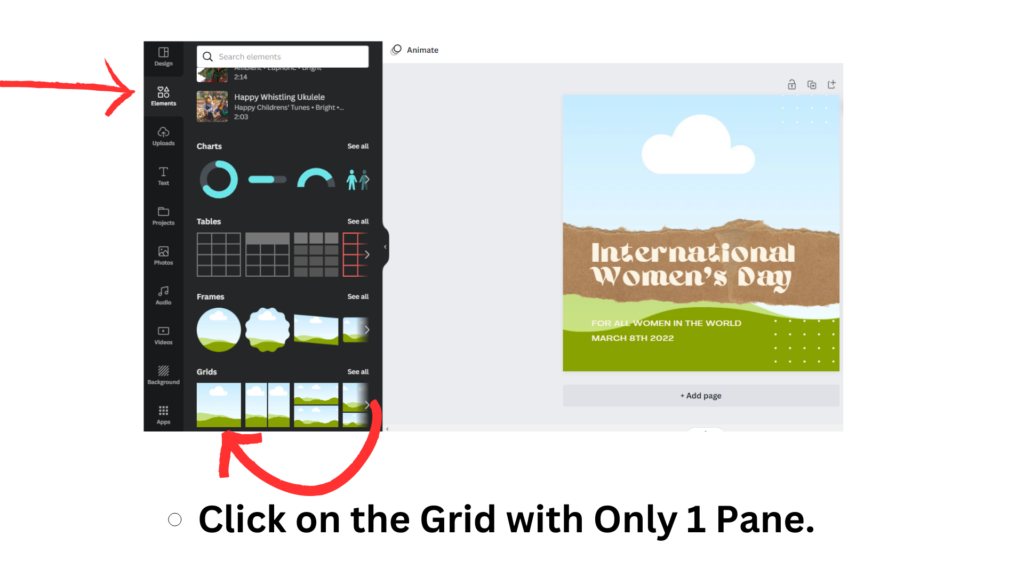
7. The grid will load fully sized. I grab the bar in the middle and pull it upward to resize the grid. I make the gird shorter, but I retain its width.

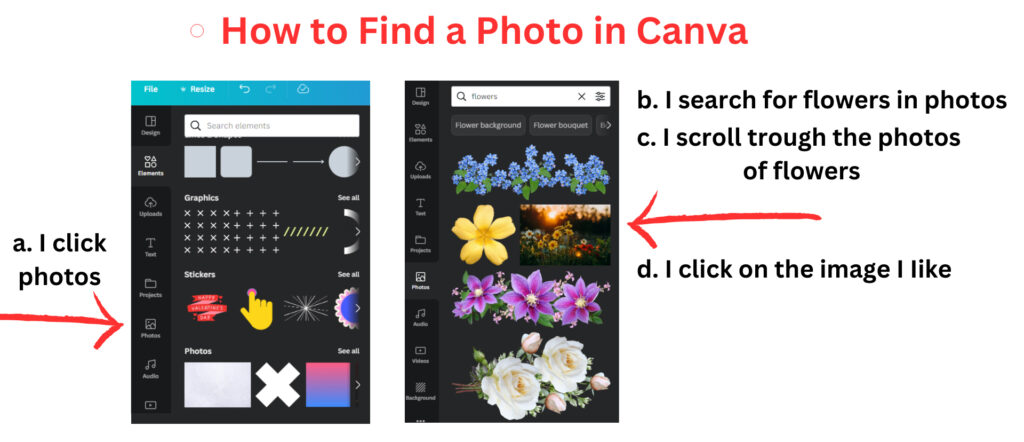
8. Now, it’s time to find a photo to place in this grid.

Now, it’s time to change the text in my post.
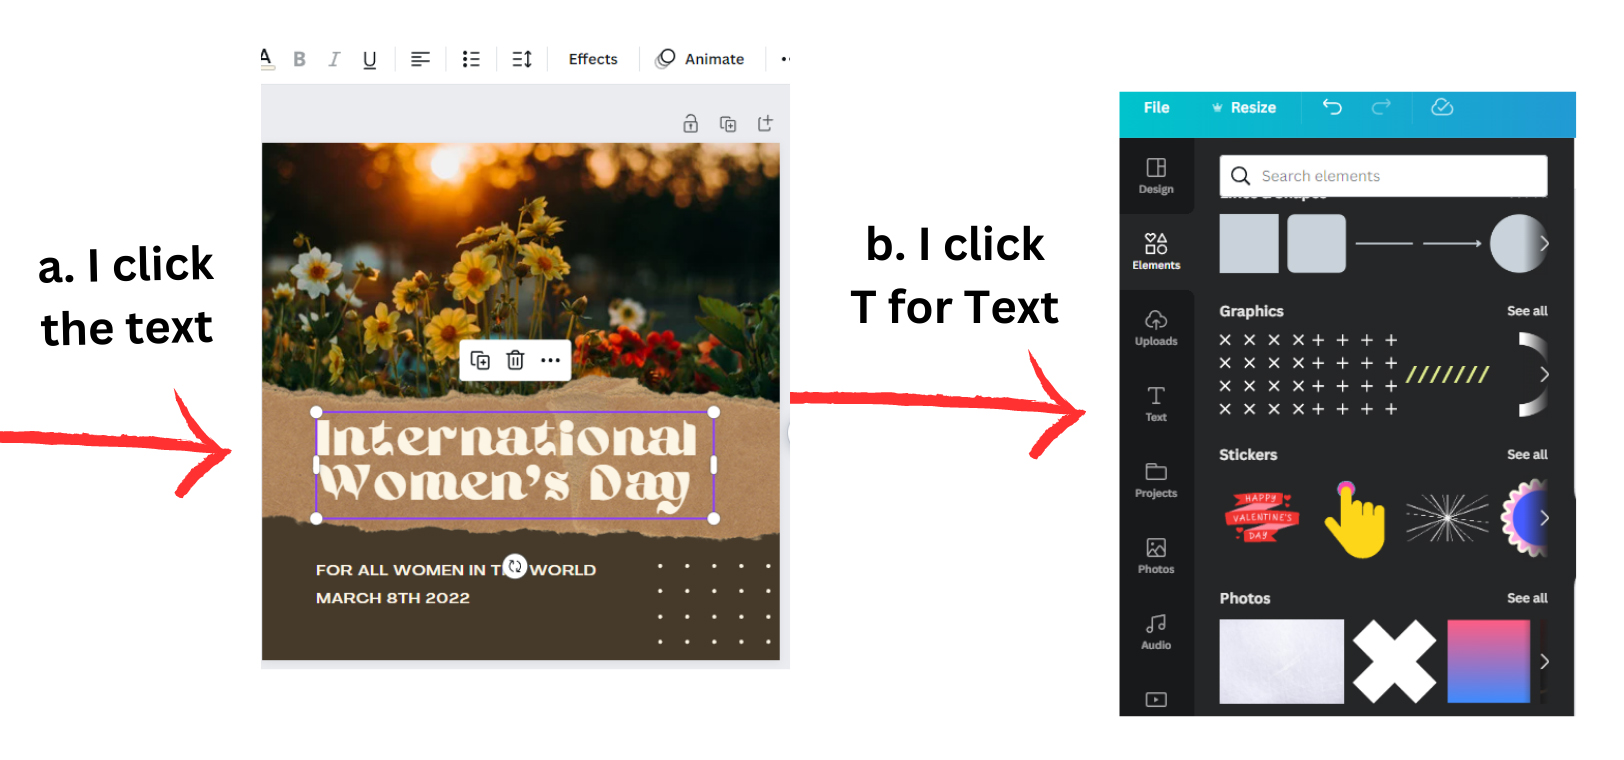
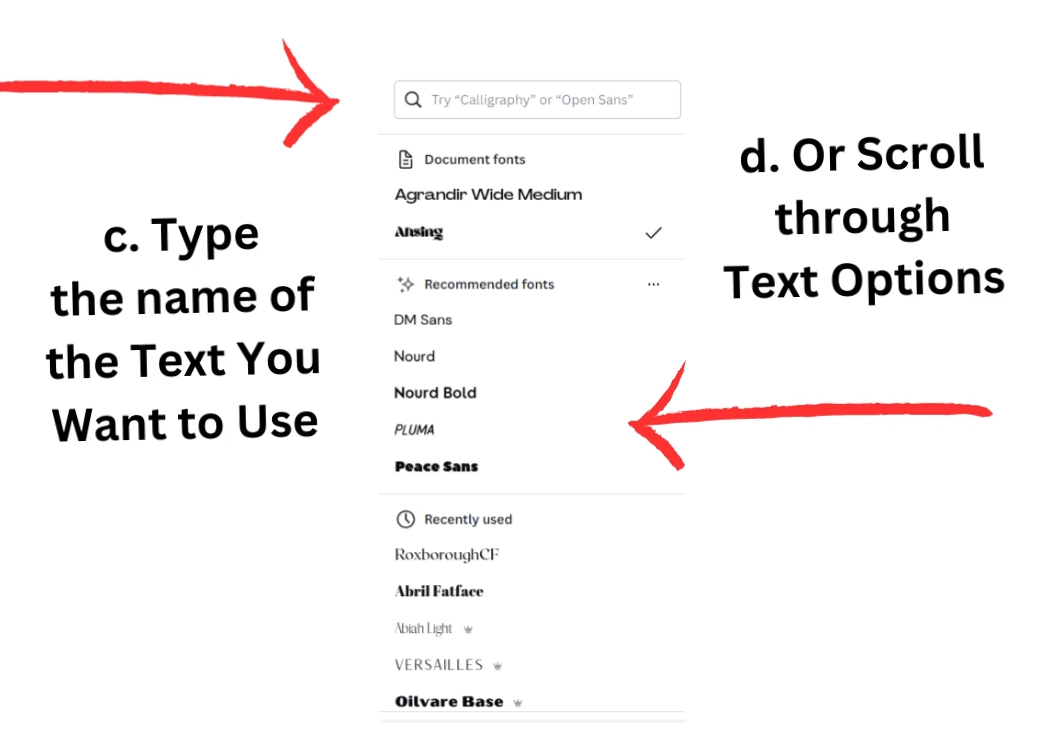

I like the type family for the second grouping of text, but I click it to edit the words.

Last, I grab the text and drag it down to a lower position.

Discover more from Jacki Kellum
Subscribe to get the latest posts sent to your email.