
Swiss Chard ‘Bright Lights’ (Beta vulgaris var cicl)
I must be twitterpated by the thought of starting my 2024 garden, but today I noticed, for the first time, a gorgeous vegetable plant Swiss Chard Bright Lights. I had always heard that Swiss Chard is bitter, and perhaps I have simply blocked out this gorgeous plant before now. But today I realized that even if Swiss Chard is very bitter, it easily stands alone–simply because of the way it looks. I bought my Swiss Chard, came home, and researched this plant for the first time. I am thrilled by what I have learned.
The following article for the Mississippi Agriculture Extension website by Dr. Gary Buchanan is very helpful:
“Gardeners seeking color for the winter landscape should look beyond traditional pansies and violas and embrace the wide range of ornamental vegetables that can be grown in Mississippi. I’ve written about the colorful varieties of ornamental kale and cabbage, but a plant that doesn’t get much press is Swiss chard. Swiss chard is a winter annual available in a variety of bright and eye-catching colors, and it will certainly attract attention if you grow it.
Though many gardeners have not heard of it, Swiss chard was one of the first vegetables to be marketed for its ornamental qualities. The variety Bright Lights, with its stems and veins of gold, orange, yellow and red, is an outstanding choice for a border planting or combination container. One of my favorite winter varieties is Ruby Red. The leaf stems and veins are a brilliant red, and the dark green leaves have a crinkly texture.
“In addition to looking good in the garden and landscape, Swiss chard is a tasty plant. Closely related to the garden beet, the leafy foliage has a mild flavor and is loaded with important nutrients. Remember we eat first with our eyes, and Swiss chard’s bright colors only enhance the dining experience. When cooking with leaves that are twelve inches or larger, be sure to coarsely chop them. Then you can add them to a stir-fry or casserole.
“I grow colorful Bright Lights Swiss chard in window boxes in our home garden. I harvest the smaller leaves at the baby leaf stage and add them directly to fresh salads. A word of caution when harvesting your Swiss chard leaves: do not harvest at the ground level. The plant produces new leaves from the center, so carefully cut and harvest leaves from the outside to ensure edible enjoyment.
” plant has an upright growth habit and will eventually arch. Swiss chard can grow more than two feet tall and two feet wide. Broad, stout stems support the leaves. Leaves can be more than a foot long and almost as wide.
“Typically, Swiss chard will grow over a long period of time. We are fortunate in Mississippi to be able to grow this beautiful and delicious plant almost year round. Unlike spinach or lettuces that die when the temperatures increase, Swiss chard is more tolerant of heat.
“When growing Swiss chard in the garden and landscape, be sure the soil is a bit alkaline. This is a time when soil testing really comes in handy. Feed with a good garden blend of 16-4-8 fertilizer at planting.” Dr. Gary Buchanan, Mississippi Agriculture Extension Service
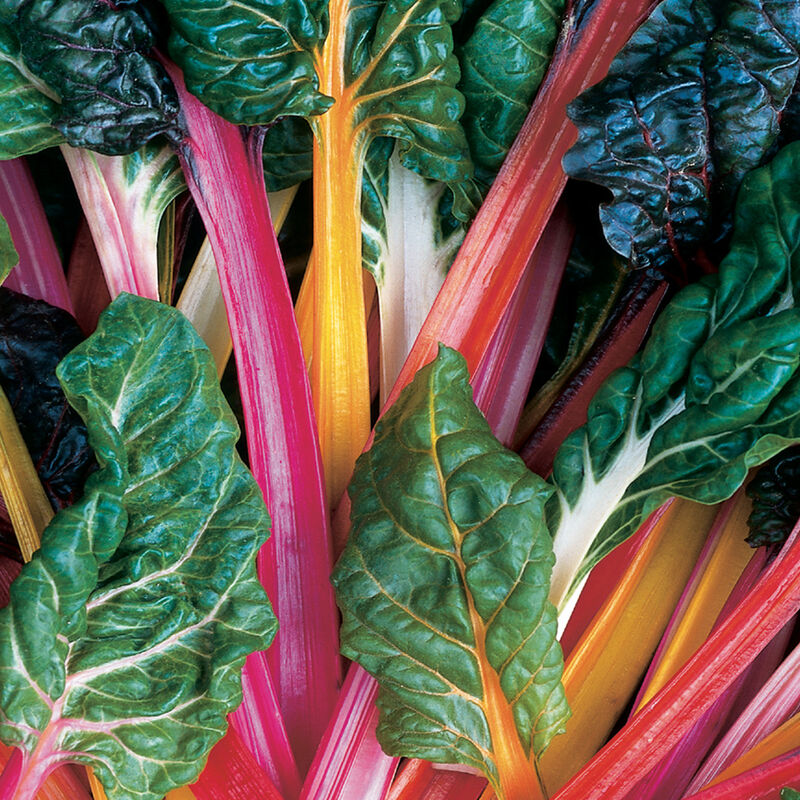
Swiss Chard Bright Lights
Image Credit: Johnny’s Selected Seeds
Height: 24″ – Each Single Leaf Can Grow to 12″ in length and width.
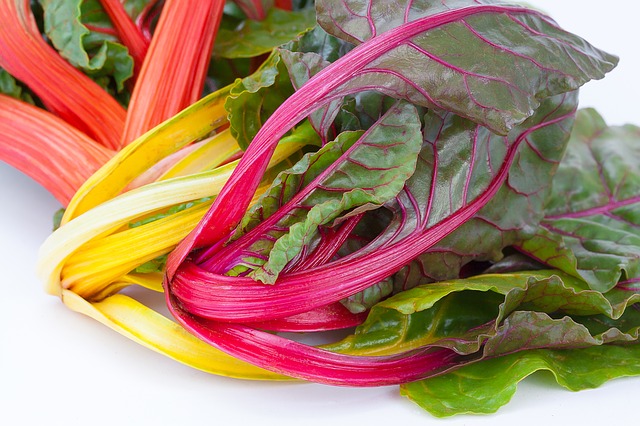
Swiss Chard Bright Lights
Image Credit: Green Hart
Here is another article written by Mississippi Horticulturalist Norman Winter
“Swiss chard is sometimes called “a beet without a bottom,” and it is edible. Eat the leaves like spinach or cook the stems like asparagus. The plants have attractive stems and leaves in colors including yellow, orange, pink-violet, burgundy and red. I was looking at a planting the other day that was backlit by the sun, and the glossy leaves glowed with the different colors.
“In one such placement, it was mass-planted as understory plants to giant taro elephant ears. In another planting, it was near the princess flower, or tibouchina. At an office complex, it was growing with pansies similar to how you would use flowering kale or cabbage. Then outside one business, landscapers had created a small, cool-season, edible landscape where it was partnered with red giant mustard and collard greens.
Bright Lights Swiss chard, the 1998 All-America Selections winner, is a plant that everyone should fall in love with. It’s easy to grow in well-drained soils, performs equally well in sun to part sun and is weather-resistant, taking frost and withstanding heat better than a lot of other spinach-like crops.
Use it as a fall or spring crop. Space plants about 6 inches apart. In the garden, this would usually mean rows 18 to 30 inches apart. But I think the flowerbed is the real location of choice. Here you would still use the same 6-inch spacing, but plant in large, informal drifts where you might plant a couple of flats.
“Another good way to use Bright Lights in the landscape would be as a pocket planting of seven to nine plants clustered behind pansies, or use three in the center of a large mixed container.
“Feed with a dilute, water-soluble fertilizer every couple of weeks during the growing season. This time of the year with garden centers going full speed on poinsettias and other Christmas plants, the bedding section may be a little thin. It will pick up in a couple of weeks, so keep your eyes open for opportunities to get Bright Lights Swiss chard.” Norman Winter Mississippi Agriculture Extension Service
How to Cook Swiss Chard
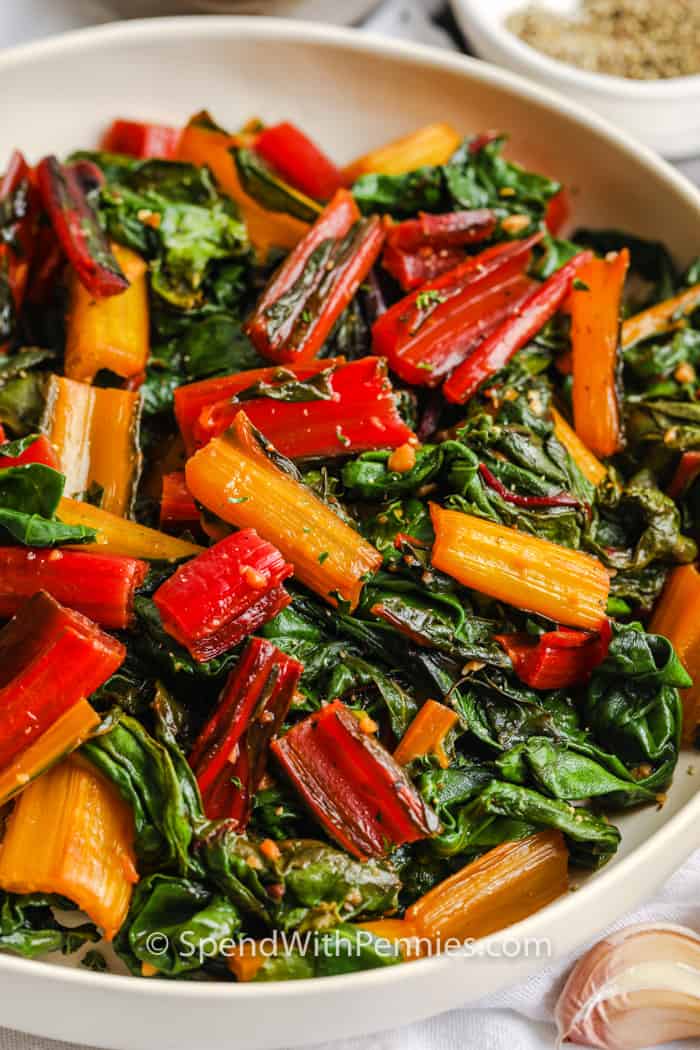
Garlic Butter Swiss Chard
Image Credit: spendwithpennies.com

Image Credit: spendwithpennies.com
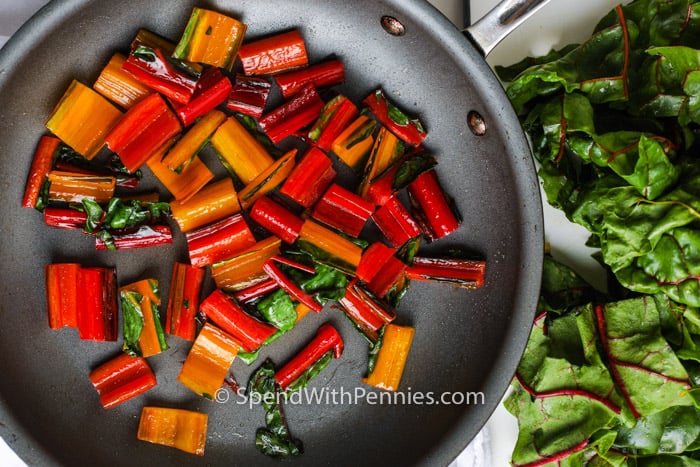
Image Credit: spendwithpennies.com
How to Cook Swiss Chard
If you can sautee spinach or kale, chard is every bit as easy!
- Rinse & prepare chard.
- Briefly saute garlic in oil & add Swiss chard stems (per recipe below).
- Cook until tender, then add leaves & white wine.
- Stir occasionally. Remove from heat, add butter, salt, & pepper & serve.
Tips for Success
- For best results, choose leaves that are uniform in size, plump, bright, and clean-smelling.
- Store fresh Swiss chard loosely wrapped in paper towels in the vegetable crisper.
- After washing Swiss chard, pat the leaves dry before sauteing them.
- Chard can be a bit bitter, be sure to generously season for the best flavor. spendwithpennies.com
Creamed Swiss Chard
Image Credit: foodiecrush.com
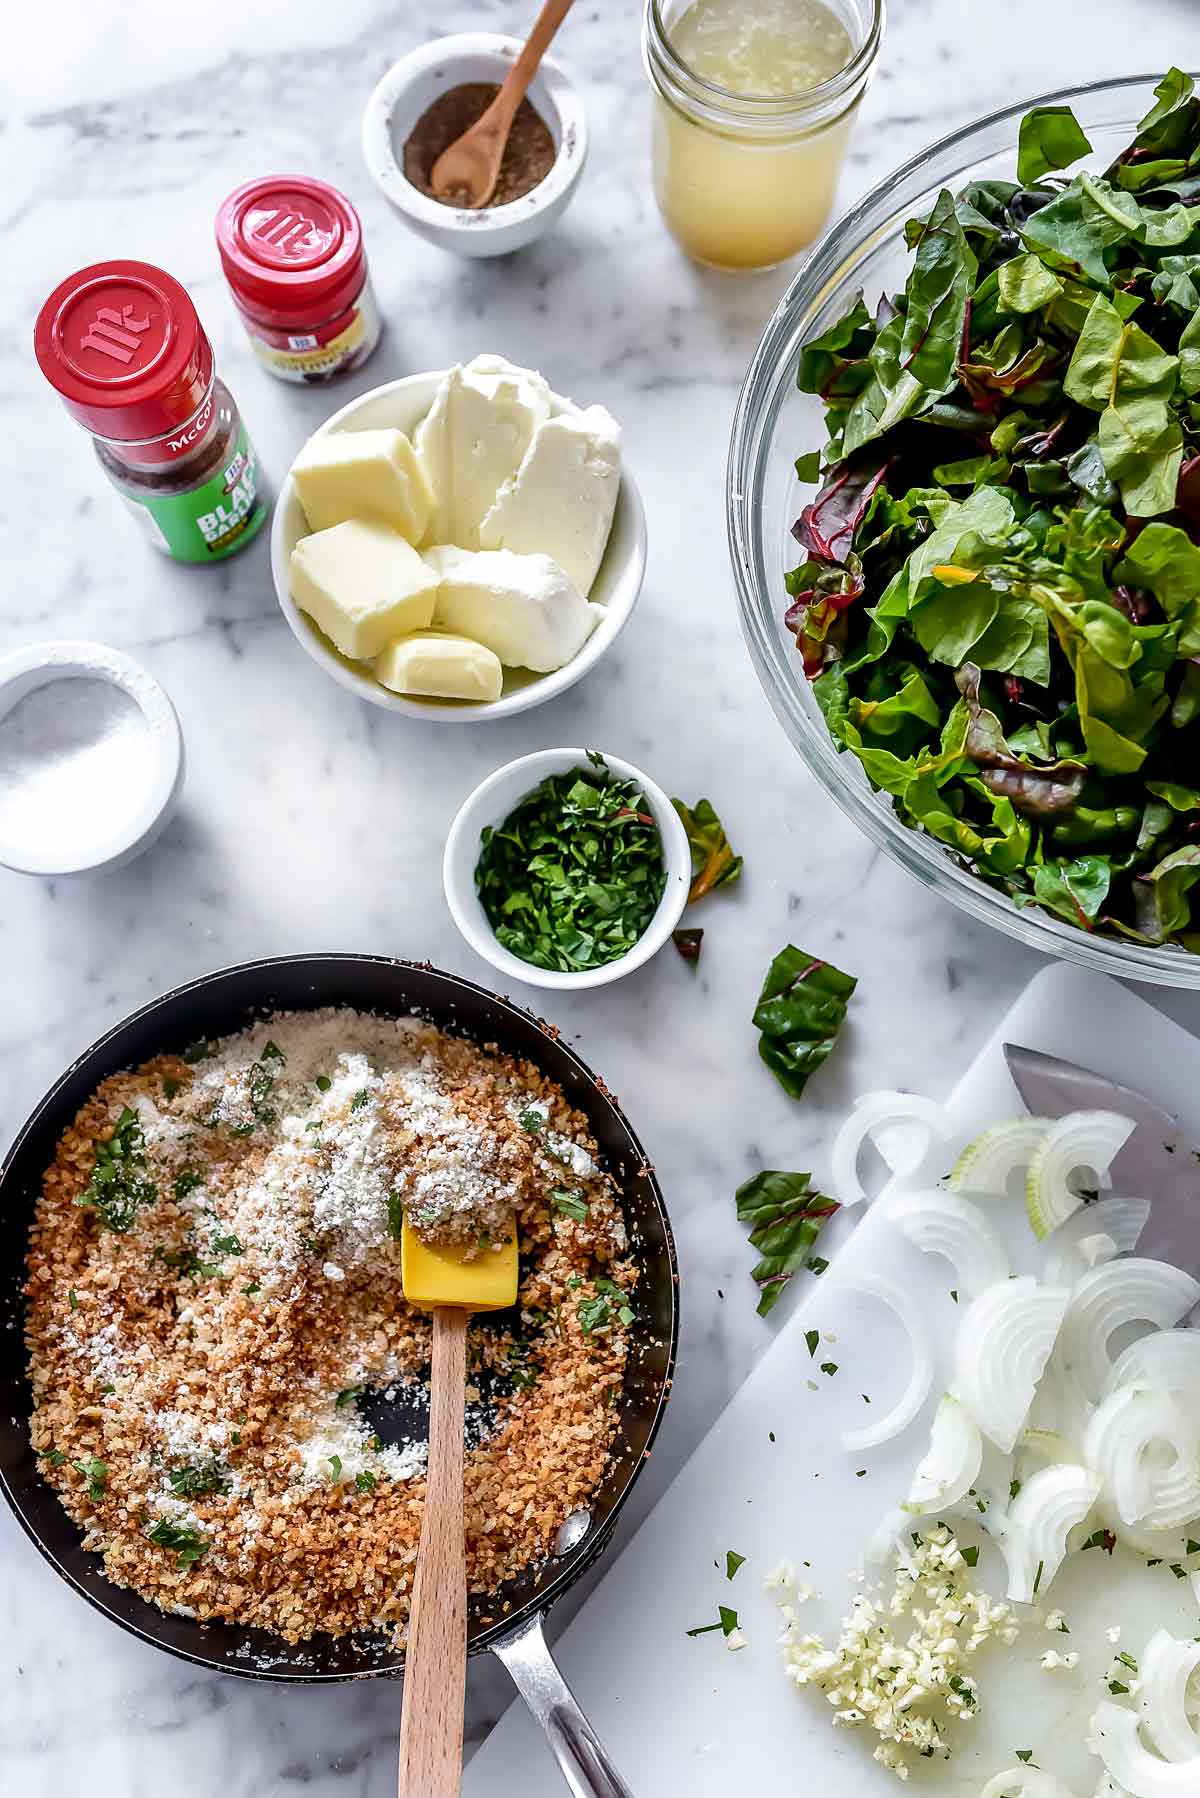
What’s in This Creamed Swiss Chard Recipe
“This creamed Swiss chard gets a double dose of flavor and texture from a savory and light cream sauce and a salty, crunchy breadcrumb topping.
Here’s what you’ll need:
- Swiss chard––you could use regular Swiss chard or rainbow chard
- Butter
- Garlic––I press or mince mine, but you could do garlic slices instead
- Shallot (or yellow onion)
- Cream cheese––adds a light and creamy tang and richness in every bite
- Chicken stock (my homemade version is incredibly easy). Feel free to use vegetable stock if you want to make this vegetarian.
- Nutmeg (ground or freshly grated)
- Kosher salt and freshly ground black pepper
- Breadcrumbs
- McCormick Black Garlic Powder Seasoning (you could just use garlic powder if you can’t find this)
- Parmesan cheese
- Parsley (fresh or dried, but you could also use thyme or rosemary in this)
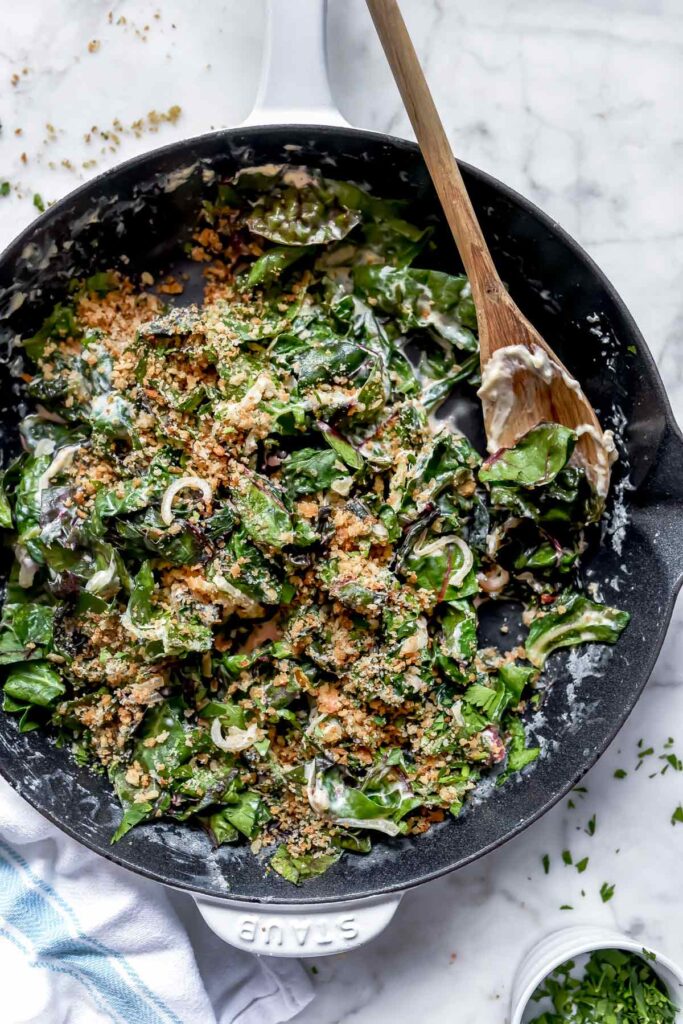
Creamed Swiss Chard
Image Credit: foodiecrush.com
“Trim those stems. It seems tragic to do so, what with how striking they are, but that’s where a lot of the bitter bite and toughness hides. Use a sharp paring knife to trim the stems from the leafy greens and roughly chop in prep for sautéeing.
Make the Creamy Sauce
“Melt the butter in a large skillet over medium heat. Add the garlic and onion and sauté for 3-5 minutes until the onions soften, stirring often.
“Add the cream cheese and the chicken stock. Whisk together until the cream cheese melts into the broth and the mixture is smooth. Season with the nutmeg, salt, and pepper and bring to a boil, then reduce to a simmer, stirring until thickened.

Assemble and Serve
Add half of the Swiss chard to the creamy sauce, gently folding it until it wilts and softens. Then add the remaining chard and fold it into the mix until it softens and reduces as well.
Sprinkle the creamed chard with the toasted breadcrumbs and transfer to a serving dish.
Ingredients
-
- For the Garlic Breadcrumbs
- 2 tablespoons butter
- ⅔ cup Panko breadcrumbs
- 1 teaspoon McCormick Black Garlic Seasoning
- ⅓ cup grated Parmesan cheese
- 1 tablespoon fresh or dried minced parsley
- 3/4 teaspoons kosher salt
Instructions
-
-
First, prepare the garlic breadcrumbs. Melt the butter in a small skillet over medium-high heat. Add the breadcrumbs and season with the garlic seasoning and kosher salt. Stir often to be sure the Panko toasts to a golden brown but doesn’t burn. Remove from heat and cool. Stir in the parsley and Parmesan cheese. foodiecrush.com
-

“Swiss chard is that bright green leafy vegetable, usually with a red mid vein, that most people inch past in the supermarkets. It looks so darn healthy it is scary, and also looks complicated and possibly bitter. I’ve been growing chard for years. One of the easiest of plants to grow from seed, this perennial in our San Diego climate reseeds itself if you let it. To harvest you cut off all the leaves except a few in the middle (to keep the plant producing food for itself). You can easily feed off of a few of these plants for years.
“Chard is Mediterranean, not Swiss, but wherever its from it comes packed with antioxidants and many other great health benefits. There is the most common red veined chard that you see in the supermarket, and there is also white or yellow veined varieties. If you buy a package of seeds called Bright Lights, it contains seeds for a mixture of these. The taste difference is negligible, and since in preparing chard you usually strip the mid vein out, it really doesn’t make much difference except as color variety in the garden.
“You can cut the leaves while very young and add them directly to lettuce mixes for salads, especially wilted salads. Or you can stir-fry them up or use them as you would baby spinach. The wonderful thing about chard is that you can use the old leaves as well. Older chard takes a little longer to prepare, but oh, it is worth the effort. To prepare older leaves, I fill half the kitchen sink with water, then with my fingers or a sharp knife, strip the green away from the mid veins and drop the greens into the water.

“Wash the greens well. If your garden doesn’t have a lot of mulch around the plants, then there might be soil kicked up on the leaves. Also, look out for any freeloaders such as snails or earwigs. I usually soak the leaves for a while, letting any thing extra float to the top or sink, then drain and rinse again. Squeeze the extra liquid from the greens and you are ready to cook.
“If you want to freeze the chard for later, boil water in a big pot (depending on how much chard you have; you can do it in batches, too), then blanch the greens by briefly submerging them in the boiling water, fishing them out and bathing them in cold water to stop the cooking process. Dry the greens and freeze in containers.
This is my recipe for cooking chard, which my kids and I have loved for years. You can prepare it this way and eat directly, or use it as filling for enchiladas, frittatas, empanadas, or any other tas or das you may desire! Photos follow the print version of the recipe.
Chard Saute
- 2 tsp olive oil
- 1 large shallot (or half an onion, or a clove or two of garlic)
- ¼ cup vegetable broth or water
- 2 large bunches Swiss chard (or more)
- Wash, wring out, de-stem and chop large chard leaves.
- In a large saute pan (that is a frying pan with high sides), heat two tablespoons olive oil to medium high. Or, if doing a mondo-huge pile of chard, use a pot.
- Chop one large shallot, or half an onion, or a clove or two of garlic and add to pan.
- If using onion, then allow to cook for a few minutes until softened.
- Add wrung-out Swiss chard and stir a little.
- Add a quarter of a cup of vegetable broth (the greens will still hold water, so you don’t need much broth. Or you can add the same amount of water).
- Cover the pan and reduce heat to low.
- Allow chard to steam for about twenty minutes (it should be simmering in there; if it isn’t, turn up the heat a little).
- Lift the lid once and stir chard.
- At the end of the cooking time, remove the lid and turn up the heat.
- Allow any extra broth to cook until almost completely gone. Be careful not to scorch!
- Remove from heat, adjust the salt to taste, and serve. I eat it with butter, or sprinkled with Parmesan cheese is also good. Yum!!
Chard Saute“In a large saute pan (that is a frying pan with high sides), heat two tablespoons olive oil to medium high. Or, if doing a mondo-huge pile of chard, use a pot.

“Chop one large shallot, or half an onion, or a clove or two of garlic and add to pan.

“If using onion, then allow to cook for a few minutes until softened. Add wrung-out Swiss chard and stir a little. Add a quarter of a cup of vegetable broth (the greens will still hold water, so you don’t need much broth. Or you can add the same amount of water). Cover the pan and reduce heat to low. Allow chard to steam for about twenty minutes (it should be simmering in there; if it isn’t, turn up the heat a little). Lift the lid once and stir chard.” https://www.vegetariat.com/2011/04/how-to-cook-swiss-chard/

At the end of the cooking time, remove the lid and turn up the heat. Allow any extra broth to cook until almost completely gone. Remove from heat, adjust the salt to taste, and serve. I eat it with butter, or sprinkled with Parmesan cheese is also good. Yum!!

Discover more from Jacki Kellum
Subscribe to get the latest posts sent to your email.