Today, The Bowtie Bunch will draw Bowtie Cat.
![]()
But before we begin, remember that our drawings will never be perfect. We are simply practicing and doing the best that we can. The more we draw, the more nearly perfect at art that we’ll become. Also remember that to participate all you need is a piece of printer paper and a school pencil.
What Is the Bowtie Bunch?
The Bowtie Bunch is a FREE art club
That Jacki Kellum has launched
For kids who want to
Learn to draw.
There Are No Strings Attached – The Bowtie Bunch REALLY Is Free
At least for now,
While kids are at home
Because of the Coronavirus
Drawing Bowtie Cat builds on the class that I taught yesterday, and the lessons are sequentially organized. If you haven’t already completed Class 1, go back and do that now. You will catch up quickly.
https://x55.68c.myftpupload.com/how-to-draw-bowtie-man-jacki-kellum-free-drawing-class-1/
How to Draw Bowtie Cat Step by Step
Again, the only materials that you need to begin to learn to draw are a plain 8.5″ x 11″piece of printer or copier paper and a regular school pencil.
![]()
Step 1: Begin by drawing a medium-sized circle a little higher on your paper than you did yesterday. Don’t draw a tiny circle.

Step 2: Very lightly draw a cross or a bullseye in the center of your circle. The horizontal line is not in the exact center. It is above the center of the circle, but the vertical line is in the center. We’ll use this cross to help us correctly place the rest of our features, but at the end, we’ll erase the cross. For that reason, you must draw the cross very lightly.

Step 3: Draw an upside-down U beneath the cat’s head. Notice that the head covers up part of the U. You will have to erase where the head blocks the cat’s body.

Step 4: About halfway between the center of the cross and the left side of your circle, draw a small circle. Place the circle exactly on the horizontal bar of your cross. You can color that circle in with your pencil. This is one of your cat’s eyes. Repeat, but this time, place the circle on the right half of the circle. This is the other of your cat’s eyes.

Step 5: Draw a kind of a double triangle above each eye. These are your cat’s eyebrows. The cat’s eyebrows are not as large as Bowtie Man’s eyebrows were.

Step 6: Draw another circle. Place it exactly on the vertical part of the cross but only a bit lower than the eyes. This circle is your cat’s nose.

Step 7: Now, we’ll draw our cat’s muzzle. To do that we’ll draw 2 circles, and we’ll allow them to touch the vertical line, side by side. Look closely at where the muzzle rests, in regard to the cat’s nose.

All that drawing requires is looking carefully.
Drawing has very little to do with talent.
Anyone can learn to draw.
But you must look carefully.
Step 8: Draw a circle to serve as the cat’s tongue, but notice that part of the circle is covered by the muzzle.

Step 9: Draw 3 lines on each side of your cat’s nose. These are his whiskers.

Step 10: Draw triangles on each side of your cat’s heads. Notice that the ears are set at an angle.

Step 11: Draw smaller triangles inside each of the larger triangles. This is the cat’s inner ears.

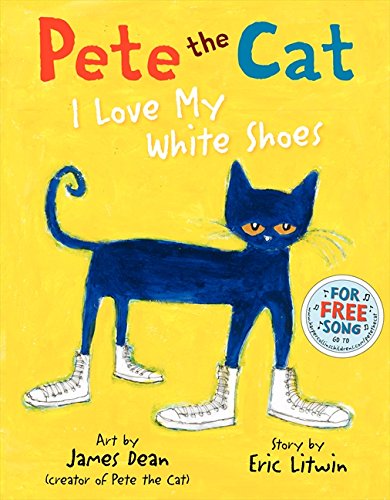
Remember that we are drawing cartoon cats, and cartoonists sometimes leave things out — on purpose. Sometimes, the inner ears of cartoon cats are pink. But that is not always the case. Have you ever seen Pete the Cat? He doesn’t have inner ears at all. Also, notice that Pete’s ears stand almost straight up.
Step 12: Draw the Cat’s bowtie just like you did for Bowtie Man in Class 1.

Step 13: Draw a rectangle on each side of your cat’s body. These are your cat’s arms.
![]()
Let’s stop for a second. Look what you have done! You could stop right here and have a fine Bowtie Cat, but if you want to go a step farther, Here We Go!
Step 14: Draw circles at the end of each rectangular arm. Notice how the hand partially covers up the arm. You will need to erase where the circles overlap the rectangles.

Once again, you can stop now. But if you are ready for more, Here We Go!
Step 15: Draw 3 tiny triangles at the outer edges of the cat’s hands. These are his claws. Erase where the claws overlap the hand.
![]()
Step 16: Draw a long, skinny triangle behind your cat. This is his tail. Where the tail falls behind the cat’s body and his arm, don’t draw. This time, just skip where the shapes overlap. That will save you a lot of extra erasing.
![]()
Step 18: Bowtie Bunch Yahoo! You have drawn the Bowtie Cat. You can color him any way that you want. In fact, you can add some other clothes and add wallpaper on the wall behind him, too.
OR
Step 19: You can try to draw a fish in your cat’s hand. That is just a bonus!
![]()
Step 20: Erase the cross or the bullseye.
![]()
Step 21: You are never finished drawing. Come back in a few days, and we’ll draw Bowtie Bunny. He is holding a carrot, and I’ll show you how to draw the carrot, too.

Tomorrow, we will draw Bowtie Kite.

The day after tomorrow, I’ll show you how to draw the Bowtie Daisy. After that, we’ll draw a Bouquet of Flowers for our springtime garden. Soon, we’ll draw a Bowtie House and the Bowtie Kids. Day by day, we are creating our very own Bowtie Worlds.


IMPORTANT NOTE: BUY A REAM OF 11 X 17 PRINTER PAPER TODAY.
Next week, we’ll begin drawing full scenes. We’ll begin by drawing a spring garden scene. Any brand of paper will work, but you need paper that is 11 x 17. Walmart and Amazon carry 11×17 printer paper. While you are at it, buy another ream [500 sheets] of 8.5 x 11 paper, too. Please have plenty of paper.
Come back every day, and watch yourself create your own Bowtie World.
I am so very, very glad that you have joined the Bowtie Bunch!
Discover more from Jacki Kellum
Subscribe to get the latest posts sent to your email.